


The CoreMedia UX team has been busy working on a new vision for our UI. We wanted to explore new interaction concepts and interface design using an example story that leads through the major parts of our product. However, our product is huge so the story became quite long.
We ended up with a Sketch prototype of more than a hundred artboards that we painstakingly animated in Principle. Now, creating clickable prototypes with beautiful animations is super fast and easy with Sketch an Principle. But at that scale, we pushed them to the limit. Here are some lessons we’ve learned and pitfalls to avoid.
But first, we would like to express our sincere gratitude to the Sketch-people at We ❤ both! They’ve helped us create an amazing prototype.
Design Phases
A project like this goes through several phases. Here is what you're looking at when you plan a large prototype.
1. Create a Storyboard
We started out drafting our story on a dozen whiteboards. First, we drafted the key points of our protagonists through the story, then we began creating a storyboard that depicted each step. We came up with 27 steps, or waypoints, through the story. This was a group effort and we gathered feedback during and after this phase.
Photo Storyboard
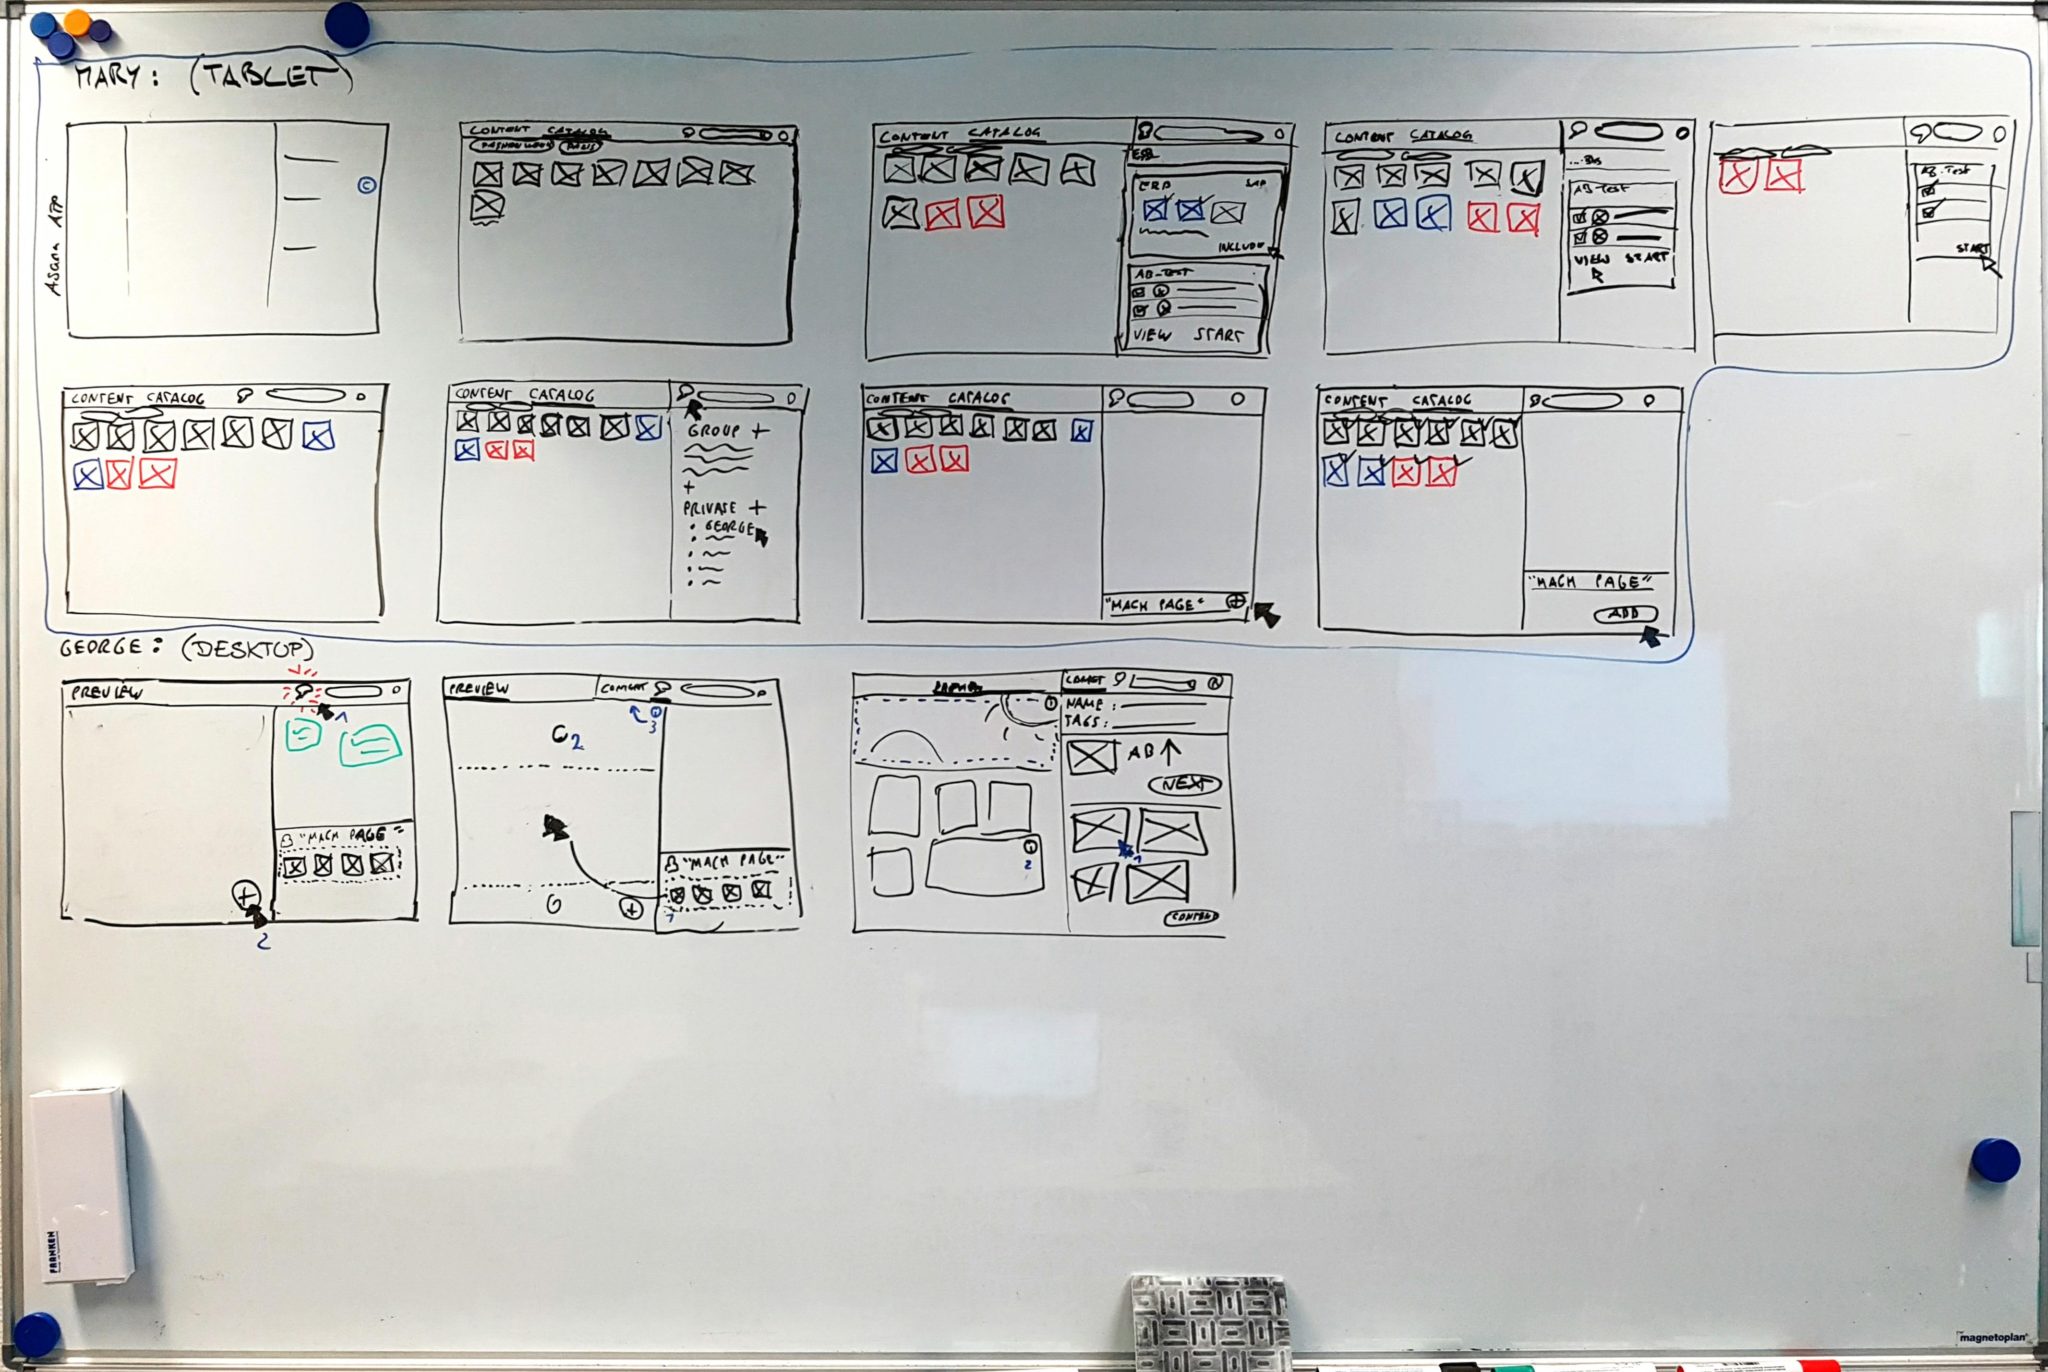
Here is one of our storyboards. We had several of those.
The storyboard already included the structure and key interactions of the app but was still very rough in terms of micro interactions and design. The whole storyboard was saved in our wiki. We gave each step a number and a little explanation so we wouldn't be confused as the project went on.
2. Design in Sketch
Then we began converting the whiteboard drawings to a high fidelity prototype. Let's call this the design phase, which was also a group effort. We already had in mind that the artboards we created would eventually be imported into Principle so we created artboards for each and every interaction. Those were the sub-steps of our storyboard steps. For example, if the user would open a menu, we would create another artboard for this sub-step. We gave each artboard a number comprising the storyboard-step-number plus a number for the sub-step, e. g. “step_4_2”.
Screenshot Sketch
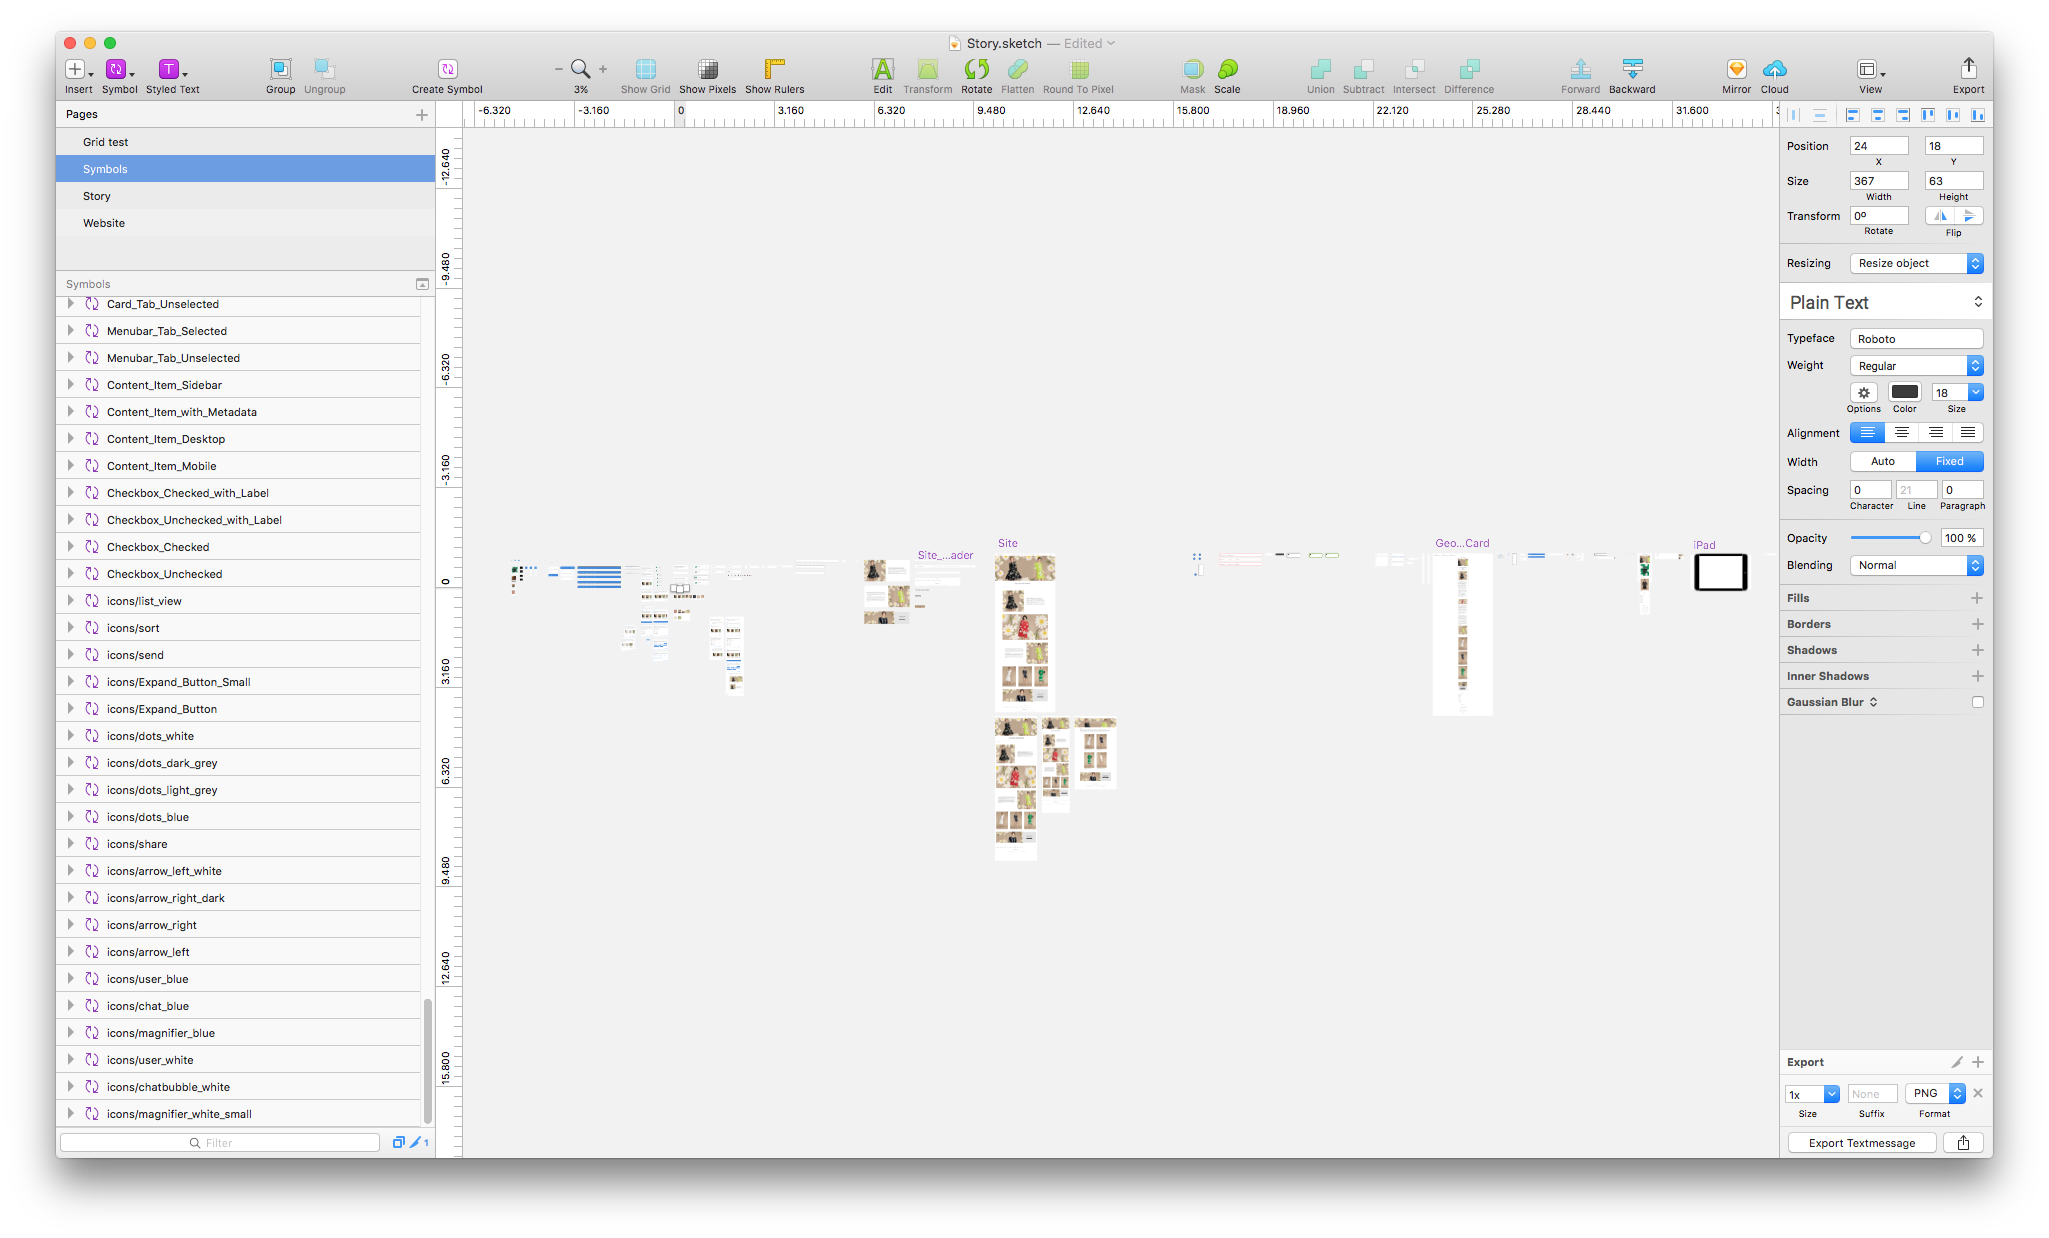
This is our symbols page. As you can see, you can see nothing. It's really cluttered.
This took a while in the beginning because we had to design things like buttons, panels, or content elements as we went through the story. Once these were all in place, adding new steps became much quicker. Most time, however, was spent on discussions about how things should work, not how they should look.
3. Consolidate your Design
Then we entered what I would call a consolidation phase. We imported our design into Principle and found a million little things that didn’t work right. We had to make our Sketch file Principle-ready (see next section). This phase includes most of the tedious work and is a job for one person. At this stage, we didn’t do any complex motion design. In fact, we only animated the transition from artboard to artboard (not from any layers) on tap so we could go through the whole story step by step.
Importing from Sketch took more than 2 minutes every time, by the way, so make sure your coffee kitchen is well stocked.
4. Design Transitions
At last we entered the motion design phase where we created nice looking transitions between certain steps. This is the part where Principle really shines though you have to understand the way Principle animates pretty well. Especially Drivers can become pretty complex.
In our prototype, the story can only be told in one specific way from the beginning to the end. This is typical for Principle prototypes but with more than a hundred steps it is sometimes hard to remember which step comes next. It is critical to really practice the story before presenting it so the click path comes off as natural.
How to Make Your Sketch File Principle-Ready
Remove Masks
Limitation: Principle likes to flatten certain layers to bitmaps (for more info). That's often OK but if you have to interact with individual elements of your design they can't be flattened. In our experience, masks were most often the culprit. Solution: sift through all of your symbols and remove all the masks in your design. Try to be clever with the order of your layers instead. It is OK for layers to stick out of the artboard, those parts won't be visible in the Principle viewer. This is all of course a bit frustrating, especially considering that Principle does support its own flavor of masks (clipping sublayers).
Detach Nested Symbols
Limitation: Principle can import symbols completely with overrides but only one level deep. So if you're using overrides on nested symbols you're out of luck. Solution: at the end of your design phase in Sketch, detach all nested symbols. Of course, this makes changes after this phase difficult so you really have to make sure that your design is solid at this point.
Principle’s Components (same as symbols in Sketch) are not helpful here yet but maybe they’ll get there eventually. We didn’t use Components at all.
Detach Resized Symbols
Limitation: Sketch has this However, this feature does not work reliably for text and images. We've experienced some glitches on resized layers where margins were just all over the place. Solution: at the end of your design phase in Sketch, detach all resized symbols that give you trouble. This is also what Principle does internally when importing your Sketch file. You will notice that Sketch is to blame here, not Principle.
Avoid Unexpected Renaming
Limitation: In the consolidation phase, a normal workflow is importing something from Sketch into Principle (☕), finding a mistake, going back to Sketch to fix it, and then re-importing(☕☕) everything in Principle. However, that can sometimes lead to unintended results as Principle sometimes renames layers in an unexpected way. Solution: In the consolidation phase in Principle, before re-importing from Sketch, just select all layers of all artboards with the mouse (not ⌘-R) and delete them. All your artboards and the transitions between them will remain. This way, Principle can start with a clean slate when doing a re-import. You’ll lose all other interactions though so make sure you’ve consolidated your design thoroughly before moving on to detailed animations.
Also, make sure to follow the tips in the next section to avoid unexpected renaming.
How to Work with Large Sketch Files
Name Your Layers and Keep them in Order
The first keyboard shortcut you should learn in Sketch is ⌘-R for renaming your layers. It is very important to name every layer and to keep everything in aptly named groups that correspondent to the hierarchy of your design.
Pro tips:
- When you use overrides, make sure that the layers within your symbols are redundantly named. For instance, if you have a symbol for a primary button, name the text layer "Label primary button". This redundancy is not needed for Sketch but when you import your design into Principle this pattern lowers the risk of layers that are identically named and potentially confusing to Principle.
- Keep the layers and groups in the same order from artboard to artboard. This helps Principle identify identically named layers.
- Use It is a great plugin that helps with bulk renaming of layers. Also, did you know about Sketch’s ⌘-F? It’s the fastest way to find all layers named “Rectangle”, for example.
Use Symbols for Everything
Use symbols for everything. Also, nest your symbols. Your artboards should pretty much only contain symbols and the few things that are specific to that very artboard. In programming, this mantra is called "DRY" (don't repeat yourself.) We've learned the hard way when we had to go through all the artboards and replace tons of layers with one big symbol that we had neglected to create.
Use a Staging Page for Animation Tests
Every Sketch prototype will have at least two pages; one for the prototype and one for symbols. When trying out animations between artboards, it can help to create another page, e. g. “Staging” in which you copy and paste only the artboards that you are currently working on. This makes importing them into Principle much faster. Principle will only import the page that is currently open in Sketch.
Be Prepared for Some Inconveniences
Here are some things that made our life harder:
- Work can’t be parallelized very well. Given the scope of our undertaking we did most of the work as a group anyway, but the consolidating phase could have been sped up immensely if it was possible to work on a Sketch file in collaboratively. There are already tools out there that can do this. We will definitely evaluate other tools when we do something similar again. Leave a comment if you can recommend another toolset.
- Navigating artboards both in Sketch and in Principle. If you want to navigate from the beginning to the end you’ll have to scroll for a long time or zoom out to a point where you can’t distinguish artboards anymore. And on the symbols page you can’t find anything anyways.
- Text overrides in Sketch are cool and we used them all the time but for long strings the input field is just too small and cumbersome.
- Overriding images in symbols is awful if images don’t have the same aspect ratio. This cost us so much time.
- Importing into principle takes a looooong time even if only one tiny bit has been changed in the Sketch file. It should offer importing specific artboards.
- It’s hard to find out if symbols are ever used or not. This makes it impossible to clean up our cluttered symbols page.
We hope these tips were helpful to anyone who is considering Sketch and Principle for a large project. If you would like to add something, please feel invited to comment.
Happy Sketching!