


Many readers enjoyed our previous post, “5 Tips and Tricks for CoreMedia Studio Users”. Here are five additional tips, tricks, and shortcuts! Let’s get started:
1. Keyboard shortcuts
Are you a keyboard magician, who only uses the mouse or trackpad if you really have to? CoreMedia Studio will not let you down. To learn about our available keyboard shortcuts, open Preferences (upper-right corner, click on your username) and switch to the "Shortcuts " tab.

Figure 1: Overview of the keyboard shortcut settings via Preferences.
Of course, if you open this window on a Mac, the shortcuts will be displayed for a MacOS keyboard layout. Speeding up your work shouldn’t take too long with your fingers flying over the keyboard!
2. Language Switcher in content area
A few releases ago, our product developers added a great feature that makes it super easy to get an overview of a content item's localization status and allows you to compare or switch between versions. Of course, you can also directly trigger a localization workflow!
Curious? Open a content item and click on the localization information at the top of the content area.

Figure 2: Open the overview of the content's localized variants
And here we go. You can see all directly localized variants. For each entry, you can also see if the status of this item is up-to-date or outdated. With the link at the button “Start localization,” you can also quickly start a localization workflow if there are any outdated versions. Now that’s a shortcut!
3. Project management tool
The project management tool is a hidden gem in the “Control Room”. It’s not only a collaboration tool or the starting point of all campaigns. It’s also a handy tool to organize your complex workflows. Whether you want to publish, withdraw, or localize content doesn't matter. If we talk about many content items, it can be challenging to collect all the pieces in one workflow. Of course, you can trigger a workflow from a content selection directly or via the library and then simply drag-and-drop the necessary remaining pieces. There is, however, the risk that you might forget one piece – especially if you work on the content over a few days. If that missing piece isn’t critical to finishing the workflow set successfully, you might miss it altogether.
Here comes the solution! Work with projects. Every time you create or edit a content item during your work, simply drag-and-drop it into your project list! You can trigger the workflow directly from your project when all is said and done.
Sound helpful? Agreed! Let’s get you started!
First, open the Control room by clicking on the icon in the upper right corner of Studio (or press F4 if you liked item 1 on this list of tips and tricks).

Figure 3: Open the control room to access the project management tool.
Now, click on “Create a new empty project” (screenshot below, step 1.) and give it a meaningful name (screenshot below, step 2).
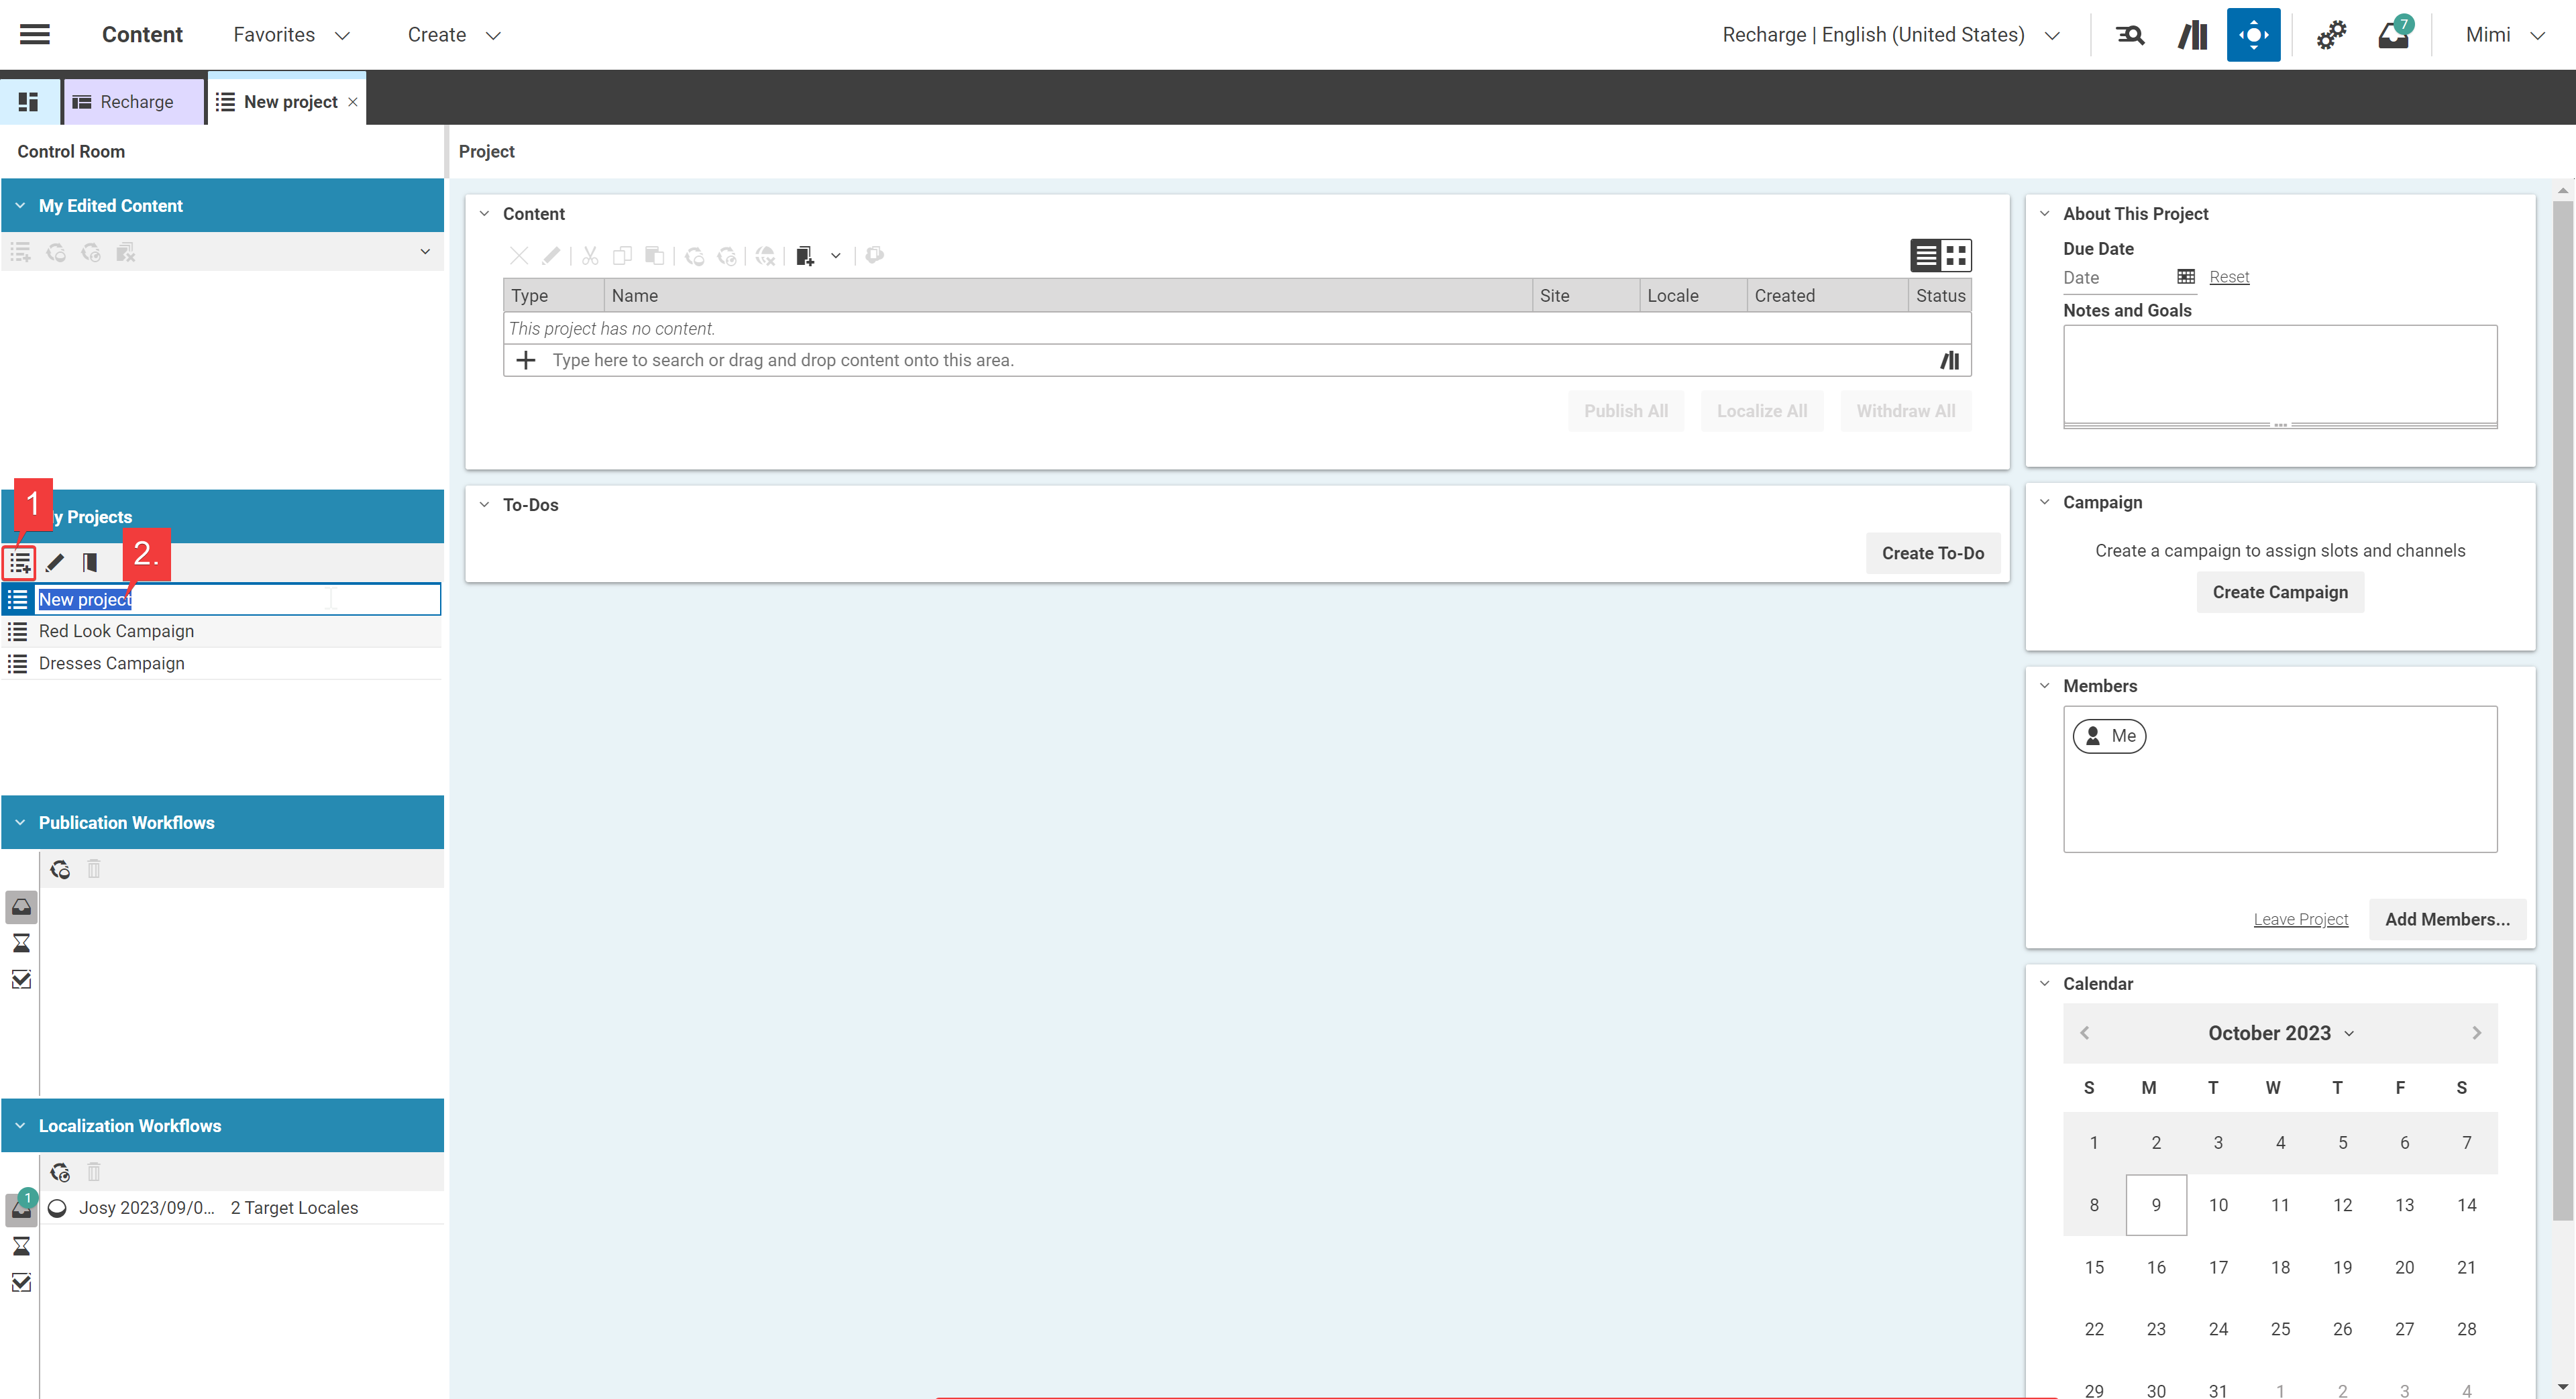
Figure 4: Create a new project from the Control Room.
You can now drag-drop all content pieces as part of your work into the “Content“ list. If you choose to collaborate, you can invite other editors in the right-hand column of the project.
To help you organize your work, you can also create to-dos – for you or colleagues you invite to participate. Give each task a due date and check it off as done once you’re finished.
Once done, select all items in the list and finish your workflow by clicking the matching button. Publication, Localization, or Withdrawal – the button will open the well-known workflow dialog box.
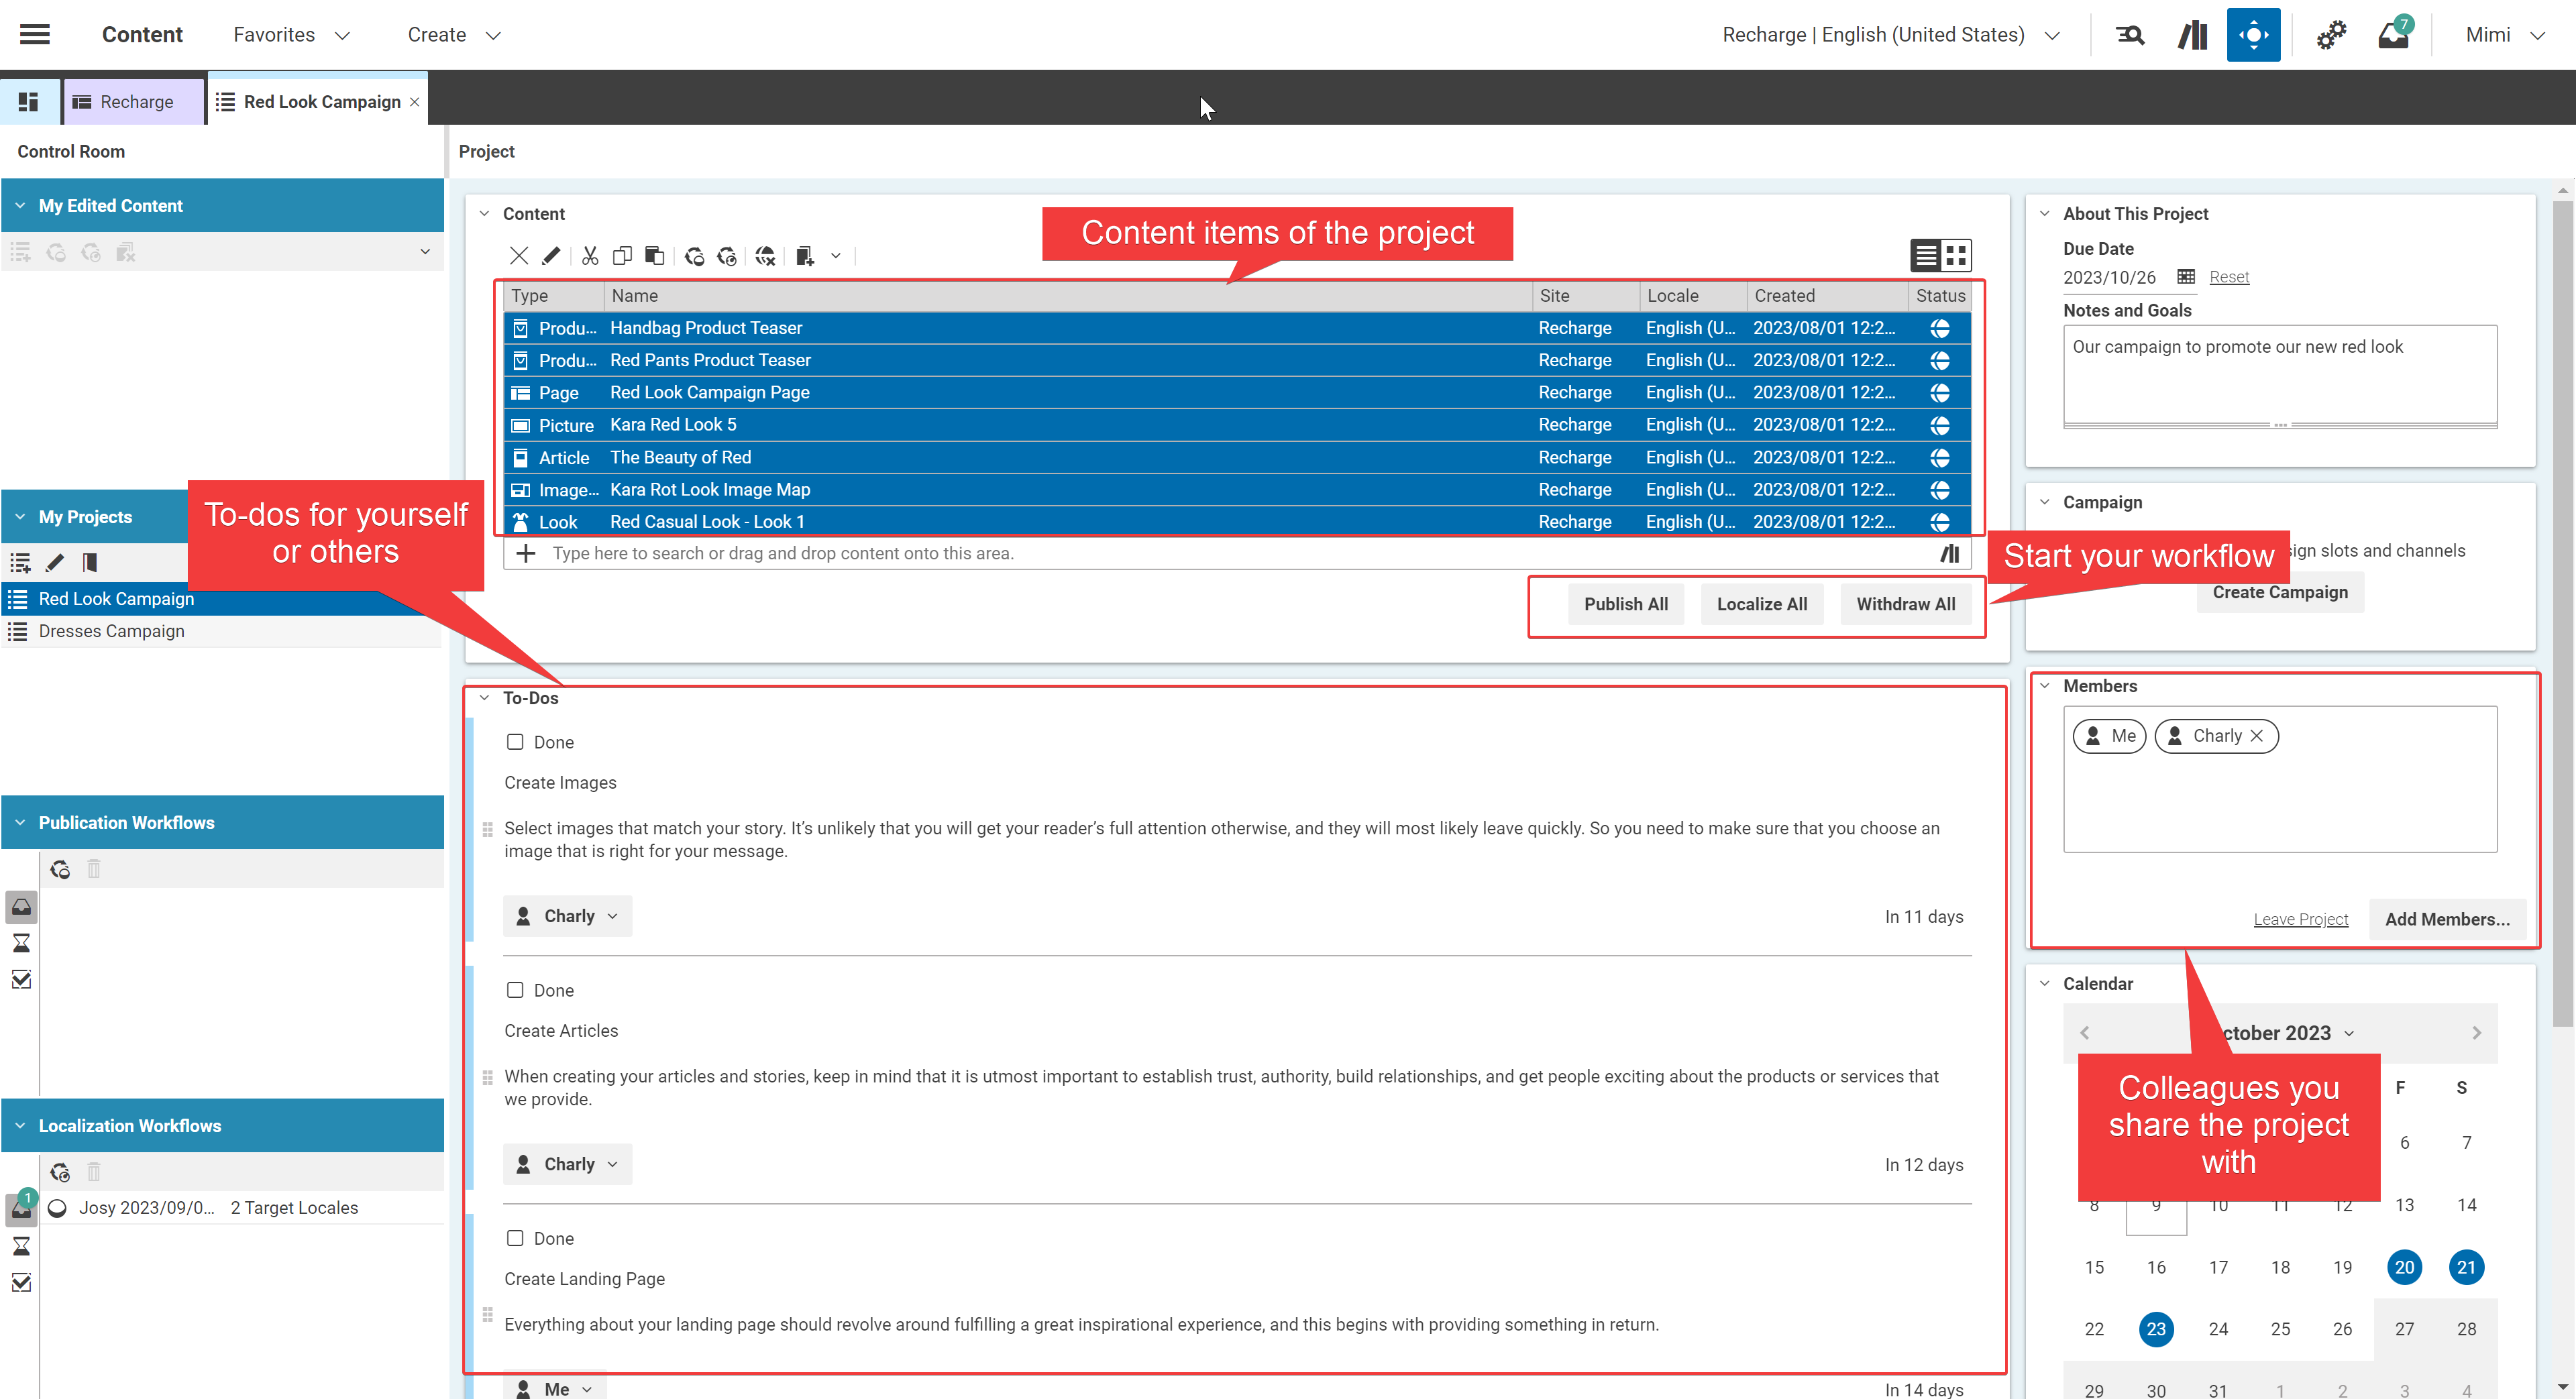
Figure 5: Overview of the project pane.
Remember that this method also comes in handy if you want to withdraw multiple pages simultaneously, which might be linked by several others!
Copy Cell Content - Library
This one is short and sweet! You can copy any cell content within the library. For example, copy and paste a long content name or the last modified date of any content item into your clipboard.
While hovering over the cell, you want to copy, perform a right-mouse-click. Choose “Copy Cell Content” in the content that appears, and the text of this cell will be in your clipboard.
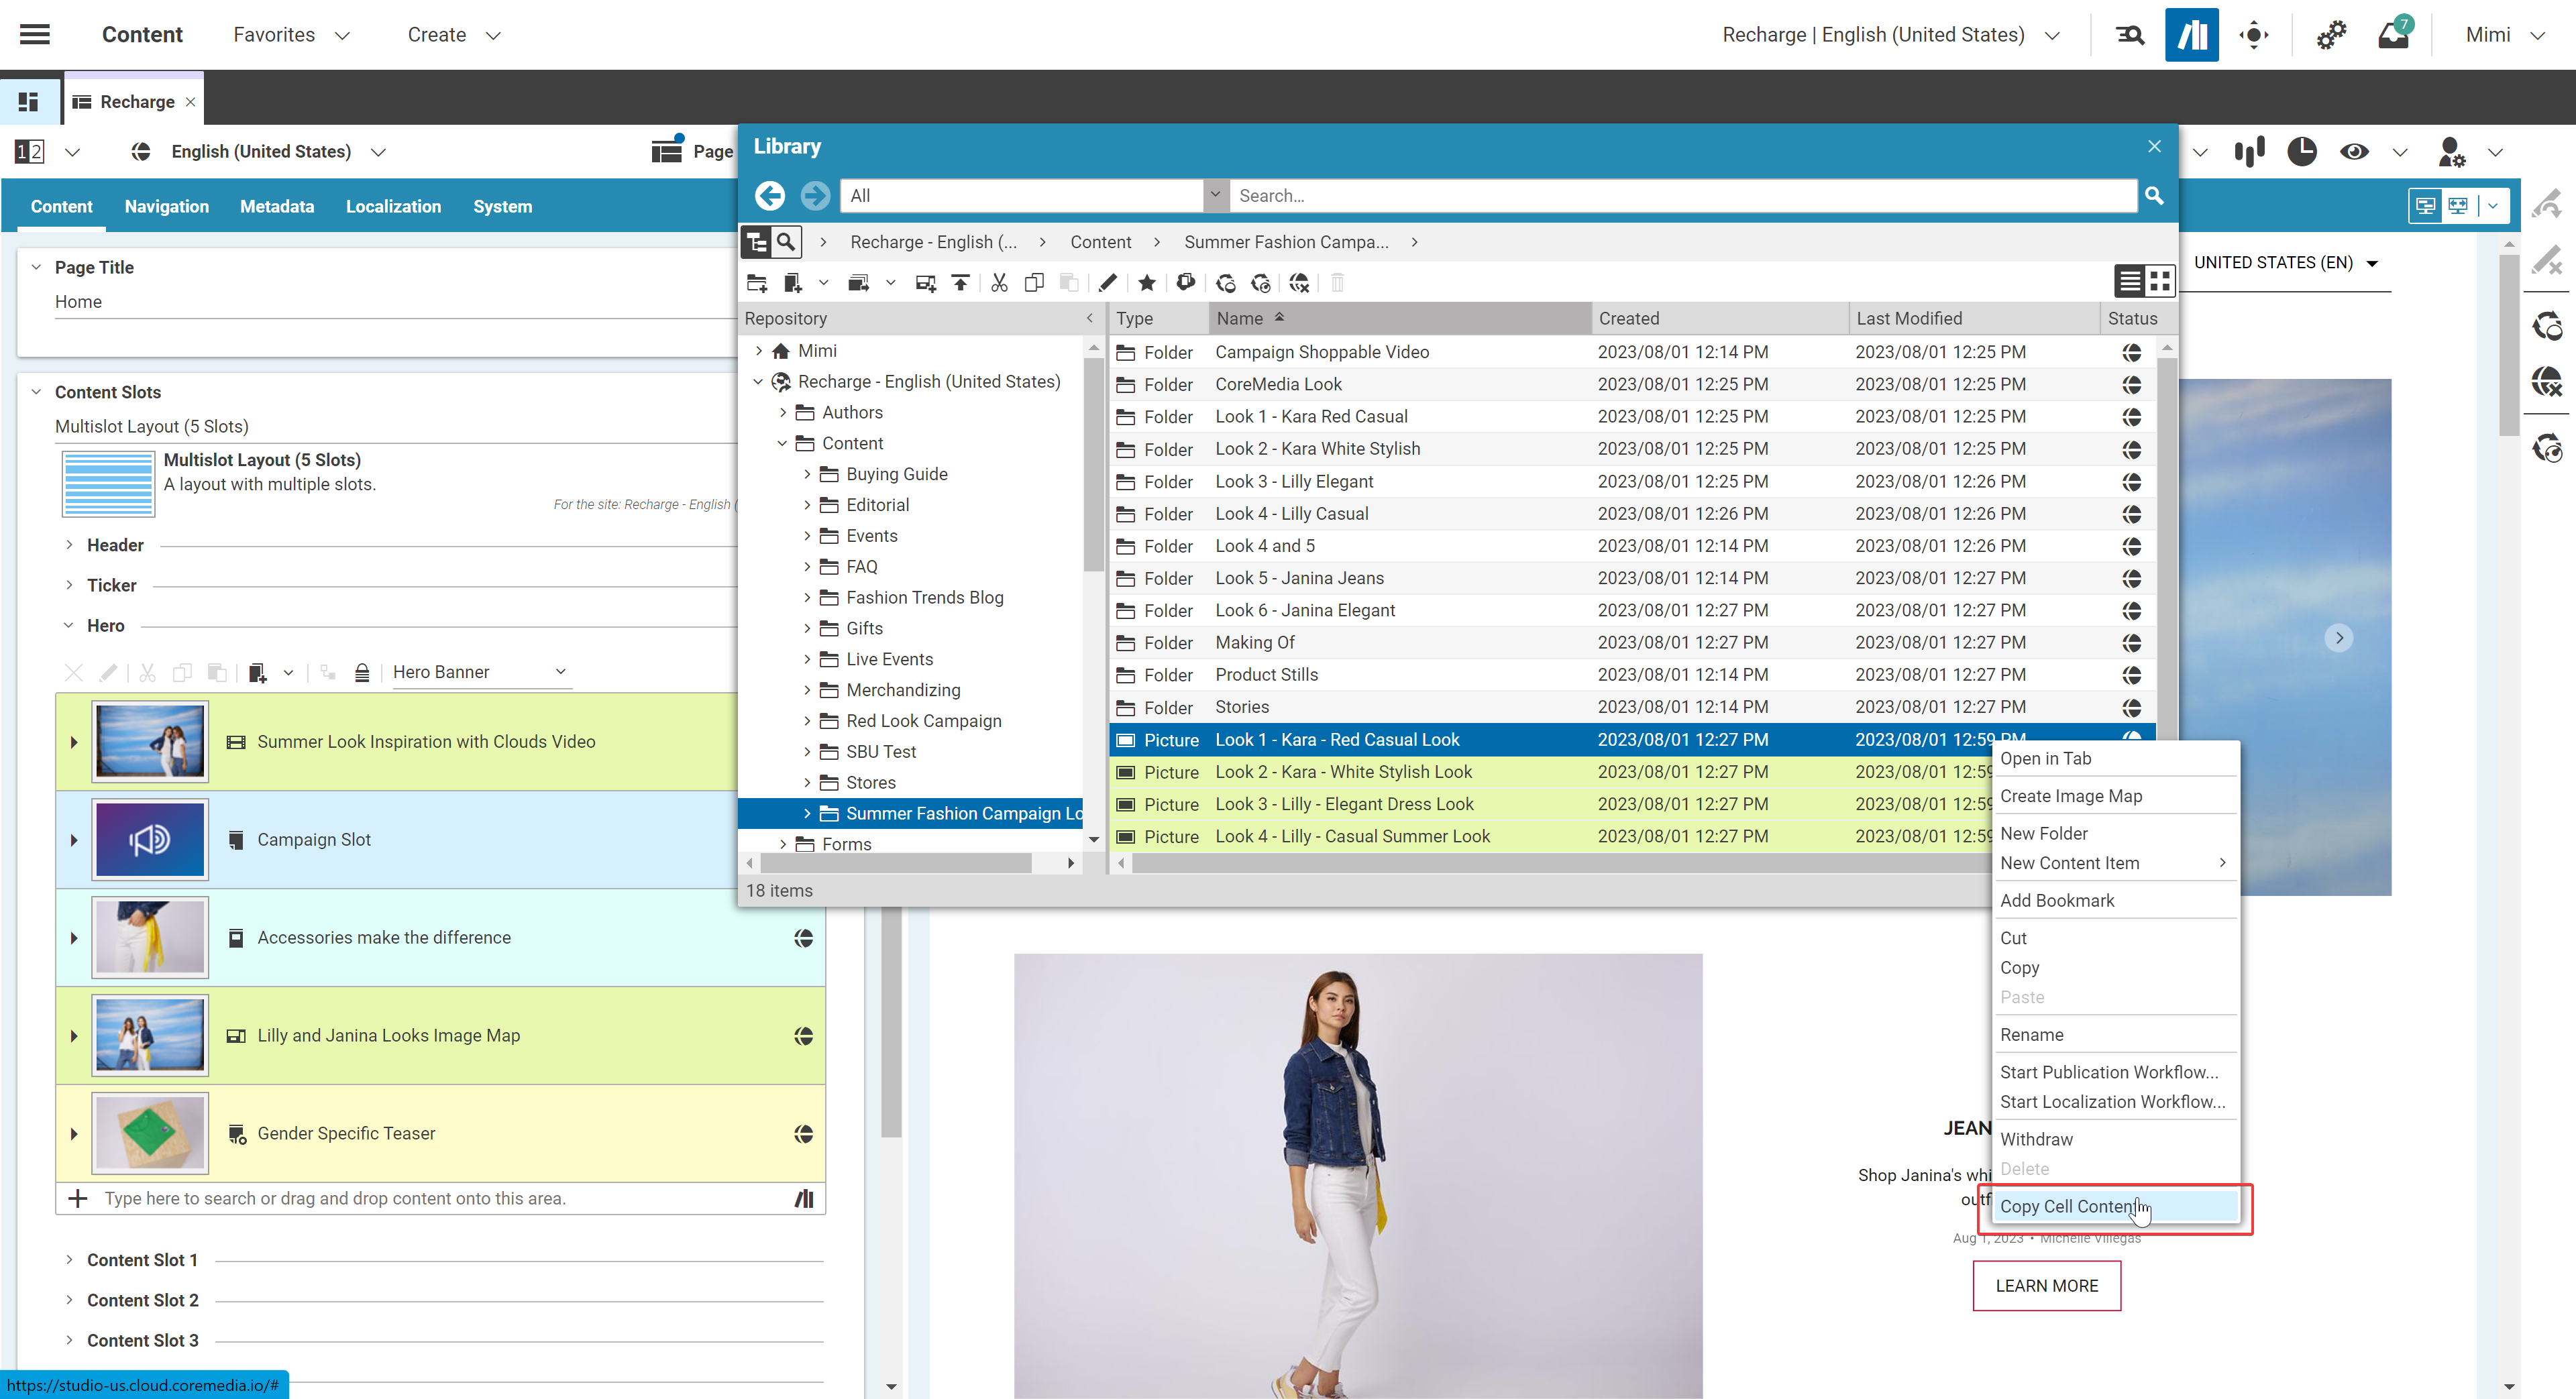
Figure 6: Copy cell content into the user clipboard.
5. Shortcut to change permissions on folders
To all you administrators out there – this one is for you! Did you know you can change permissions and access control to a folder directly through the library?
It’s super easy! Open the library and navigate to the folder you want to apply specific configurations based on group assignments. Right-click with the mouse and choose to open ” Properties ” in the menu that appears:
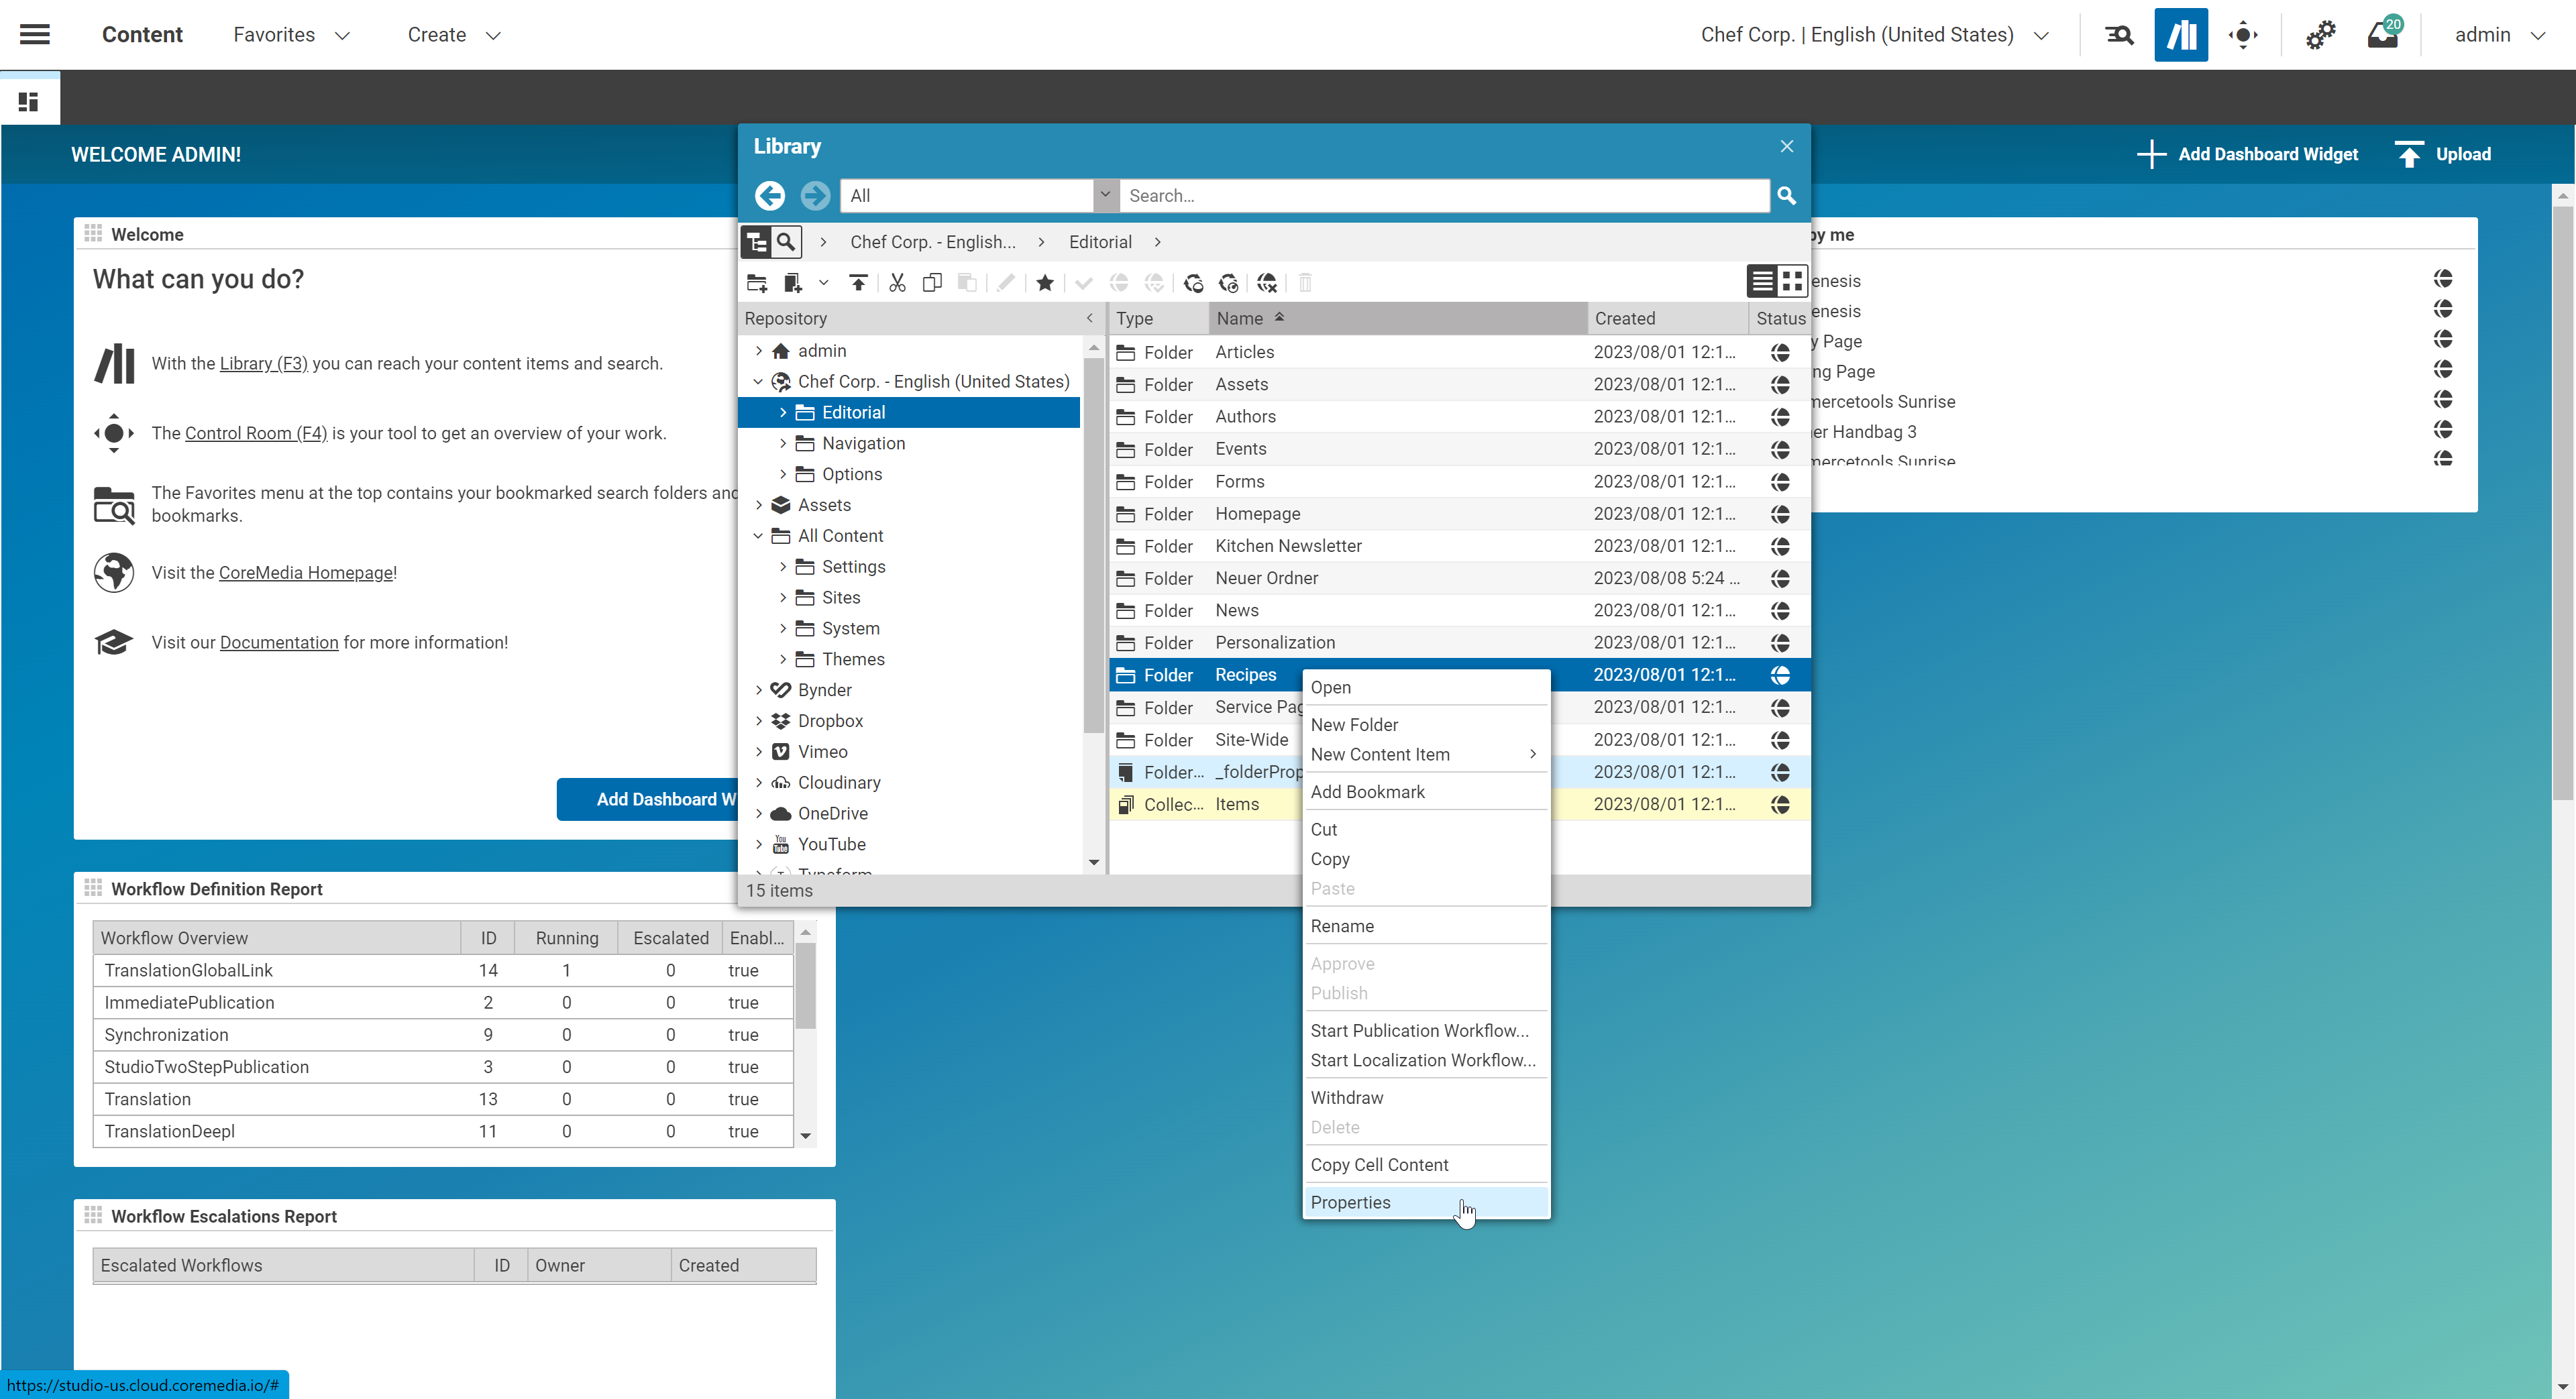
Figure 7: Open the permissions popup on a folder via the library.
A popup appears with the filing information of that folder, as you can see in the following screenshot. Switch to the “Permissions” tab. Here, you can start searching for the existing user groups. Select the one that you would change for that folder. For example, I changed the permission to “local-site-manager-c”. Now, just as within the User Manager, you can click into the column “Type” cell and select the content type you would like the rule applied to. The following columns allow you to check and uncheck checkboxes to define whether users of the group chosen group can Read, Edit, Delete, Approve, Publish, or Supervise the content in the selected folder.

Figure 8: Define a rule for this folder based on existing group assignments.
Of course, you can configure these changes for multiple groups or content types. To save your changes, click on the “Save” button!
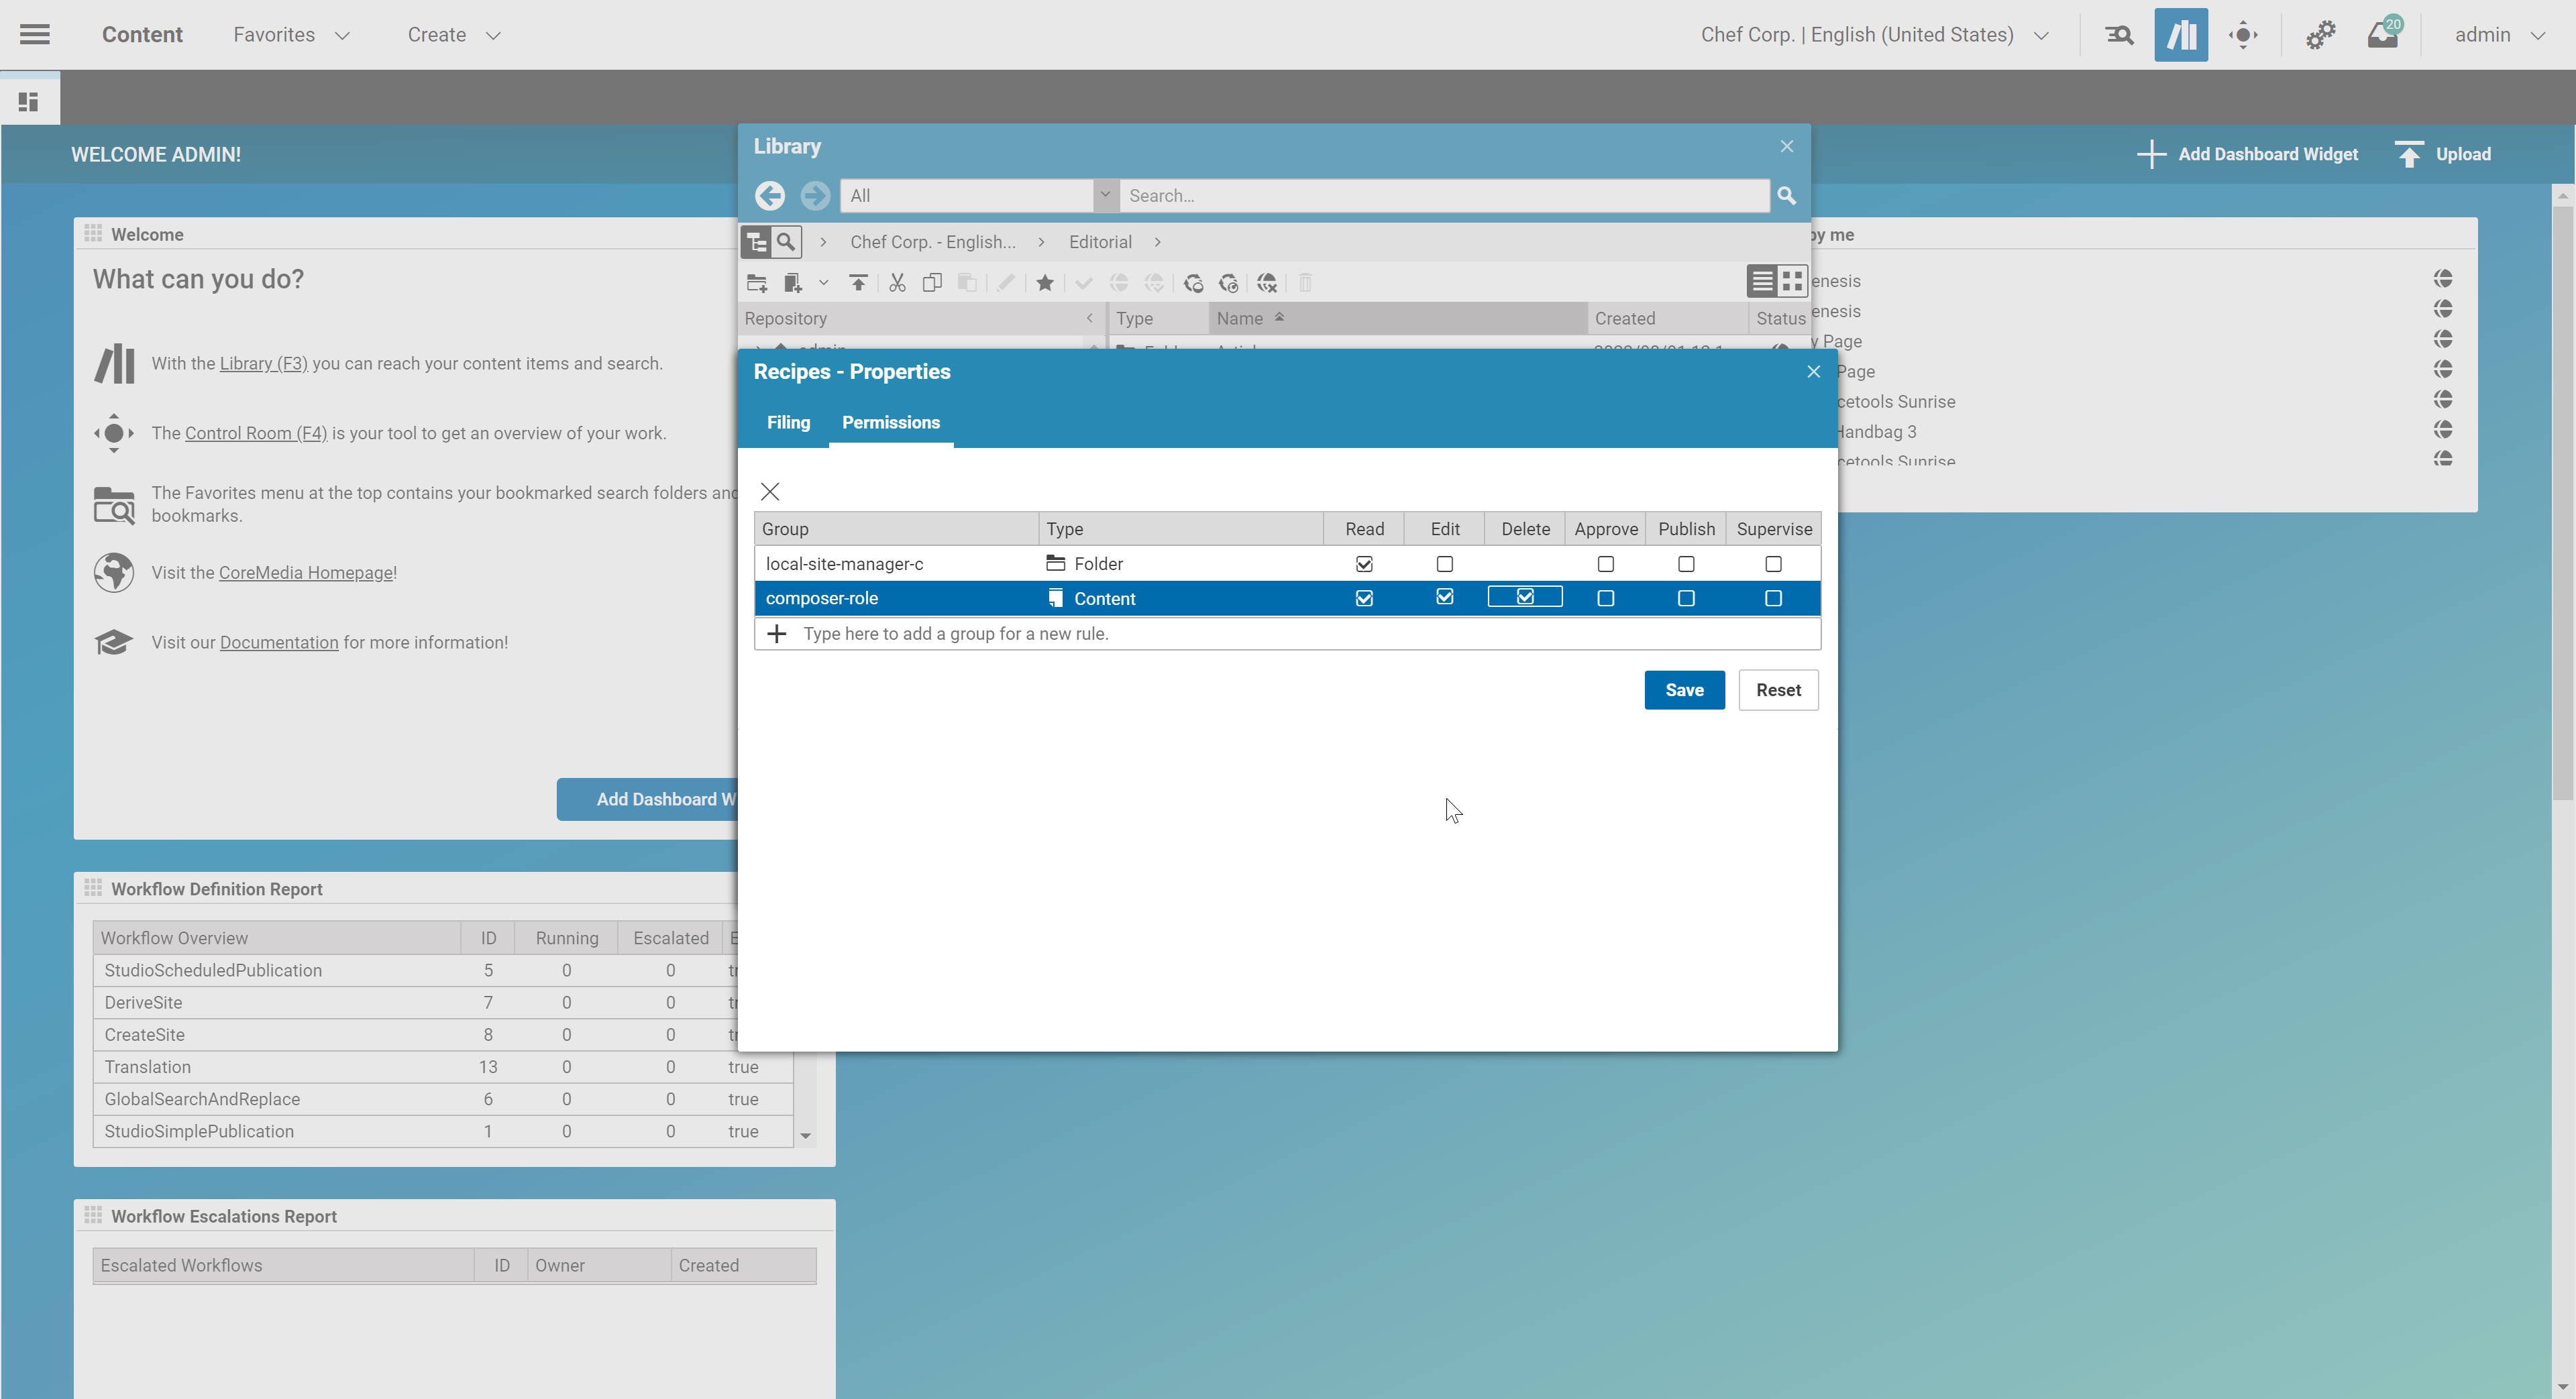
Figure 9: Configured permissions example.
The new custom rule is now saved and editable in the User Manager. See the screenshot below! The new entry is available in the “Rule” tab for the group “local-site-manager-c”.
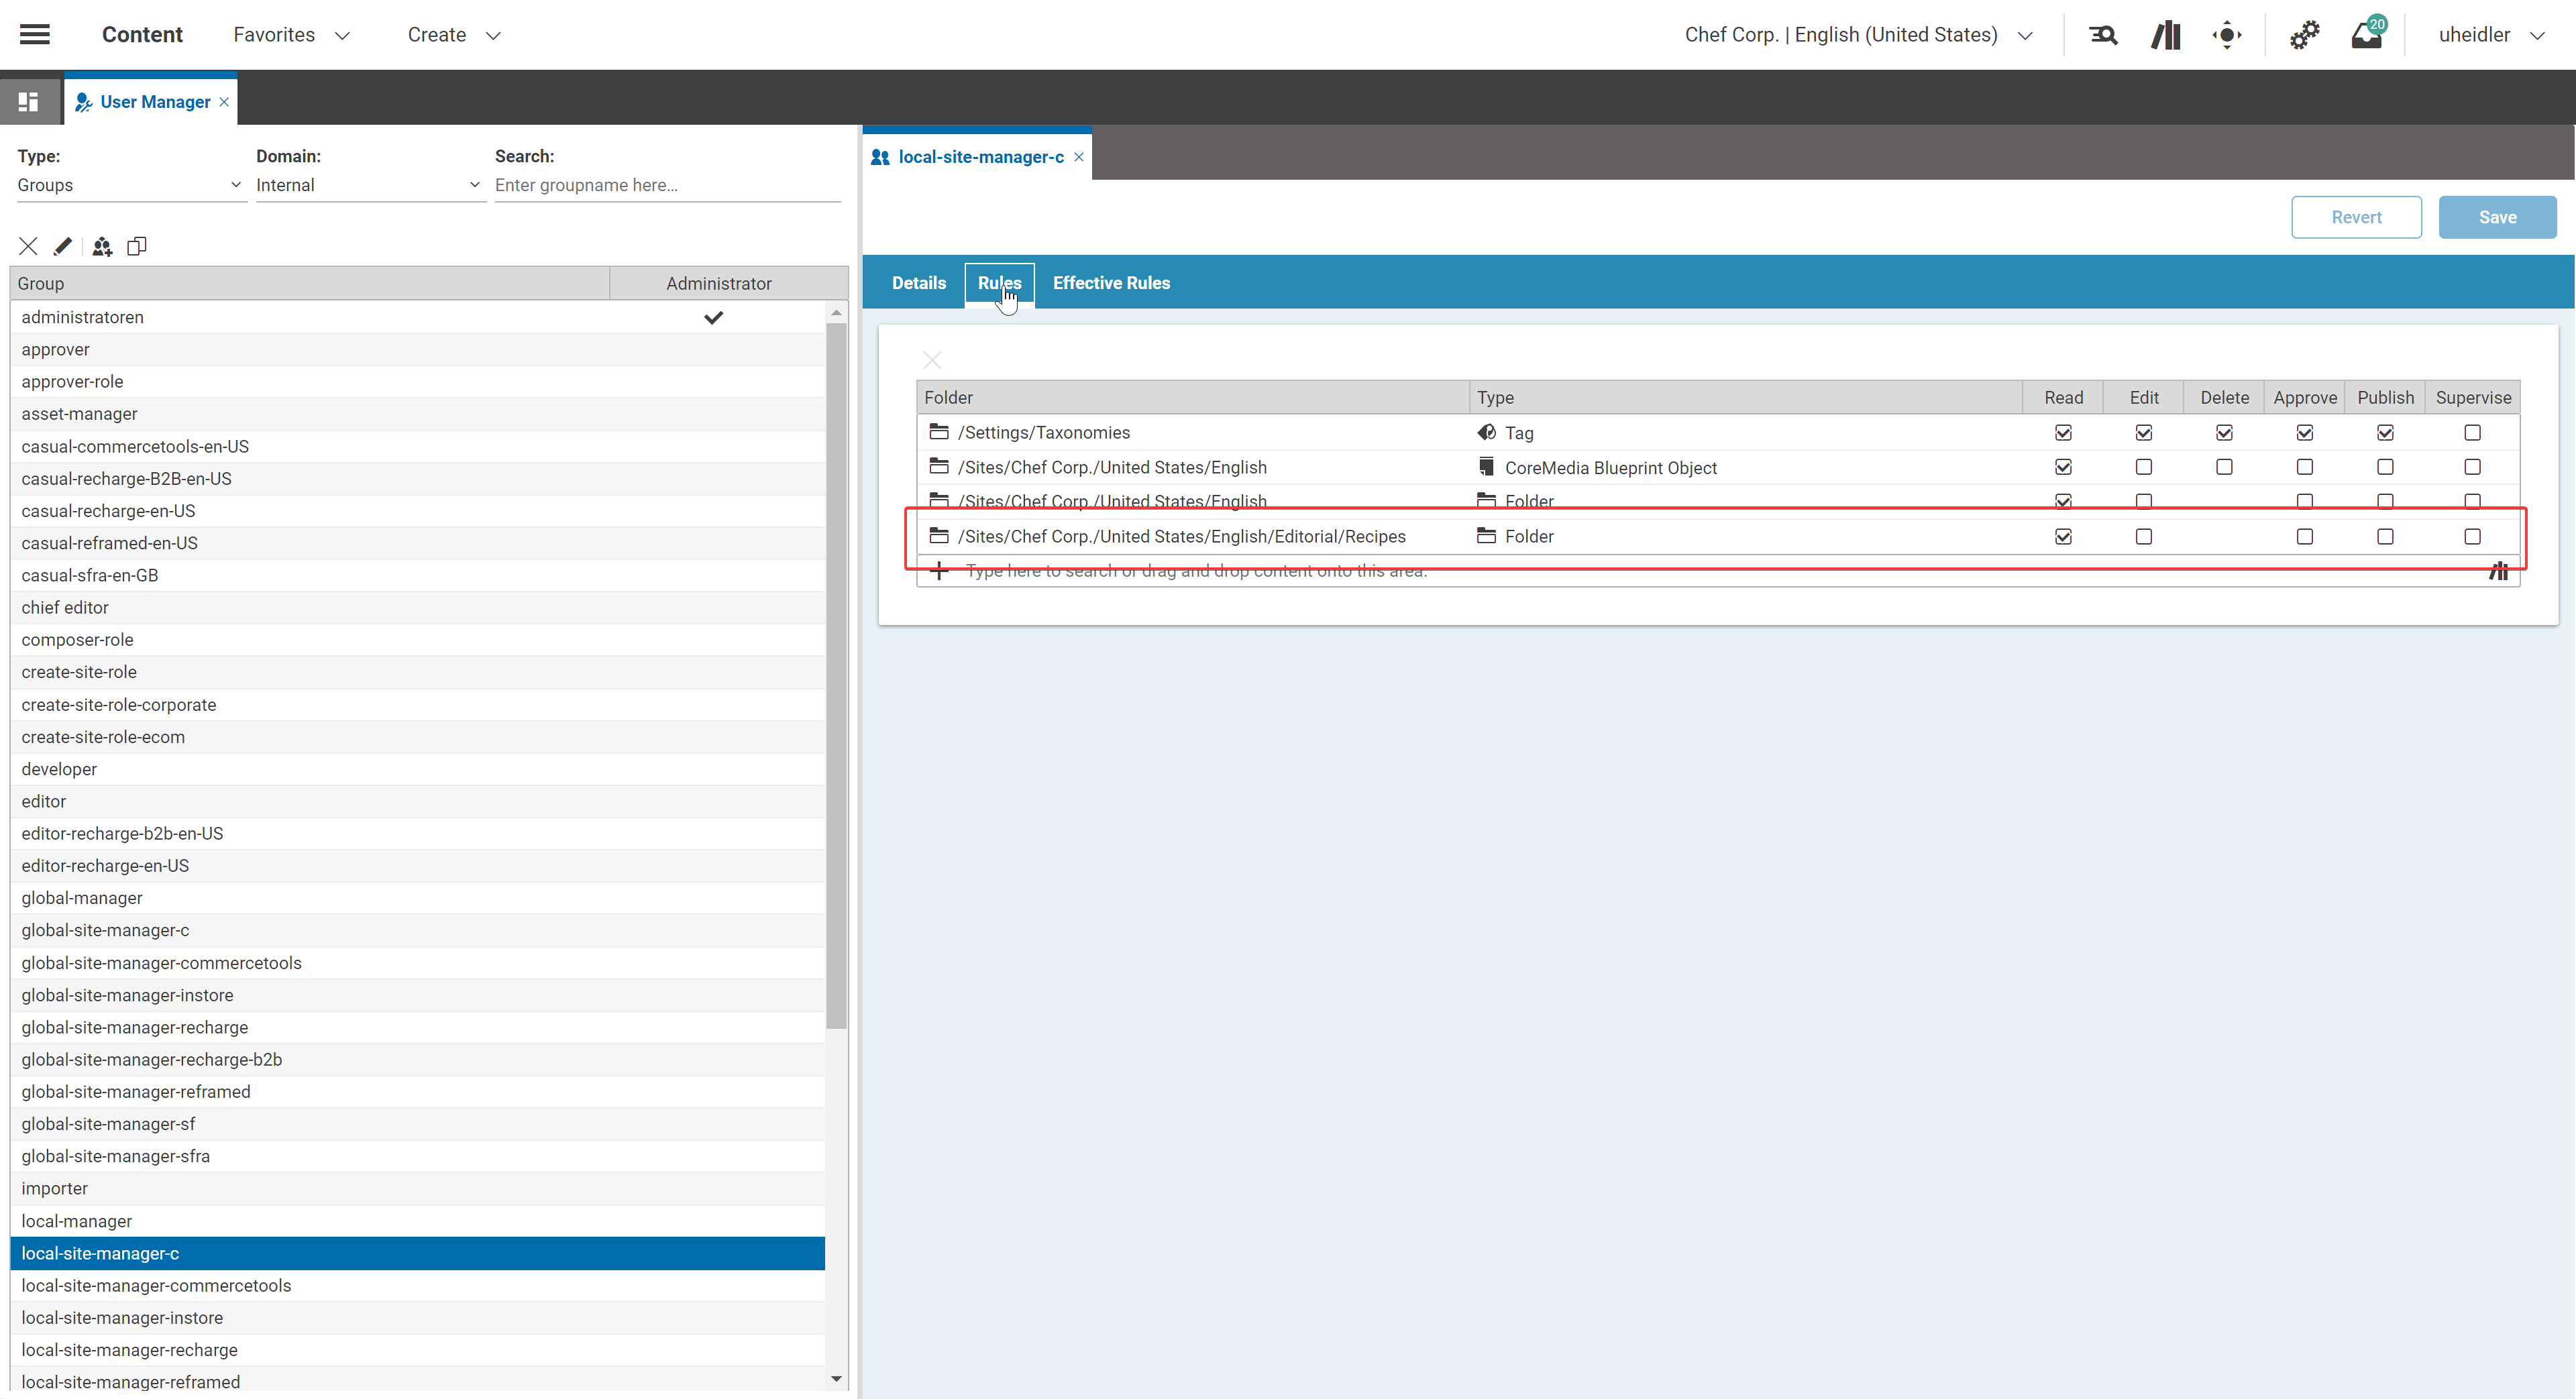
Figure 10: The User Manager reflects the new set of rules.
This shortcut should come in handy occasionally!