


Starting to use new software always has its learning curve. Especially powerful UIs, like the CoreMedia Studio, have a lot of features and functions, and it’s always a good idea to remind ourselves of these few essential tools to make the most of software, while being as efficient as possible. Here are five tips and tricks essential to enhancing your CoreMedia Studio experience.
Without further ado, let’s start!
1. Dashboard widgets
The dashboard offers a great way to provide an overview and entry point for the everyday work of editors. It’s a time-saver in the morning to pick up where you left off the day before or to access the content you most commonly work on – so much is possible.
Figure 1: CoreMedia Studio Dashboard
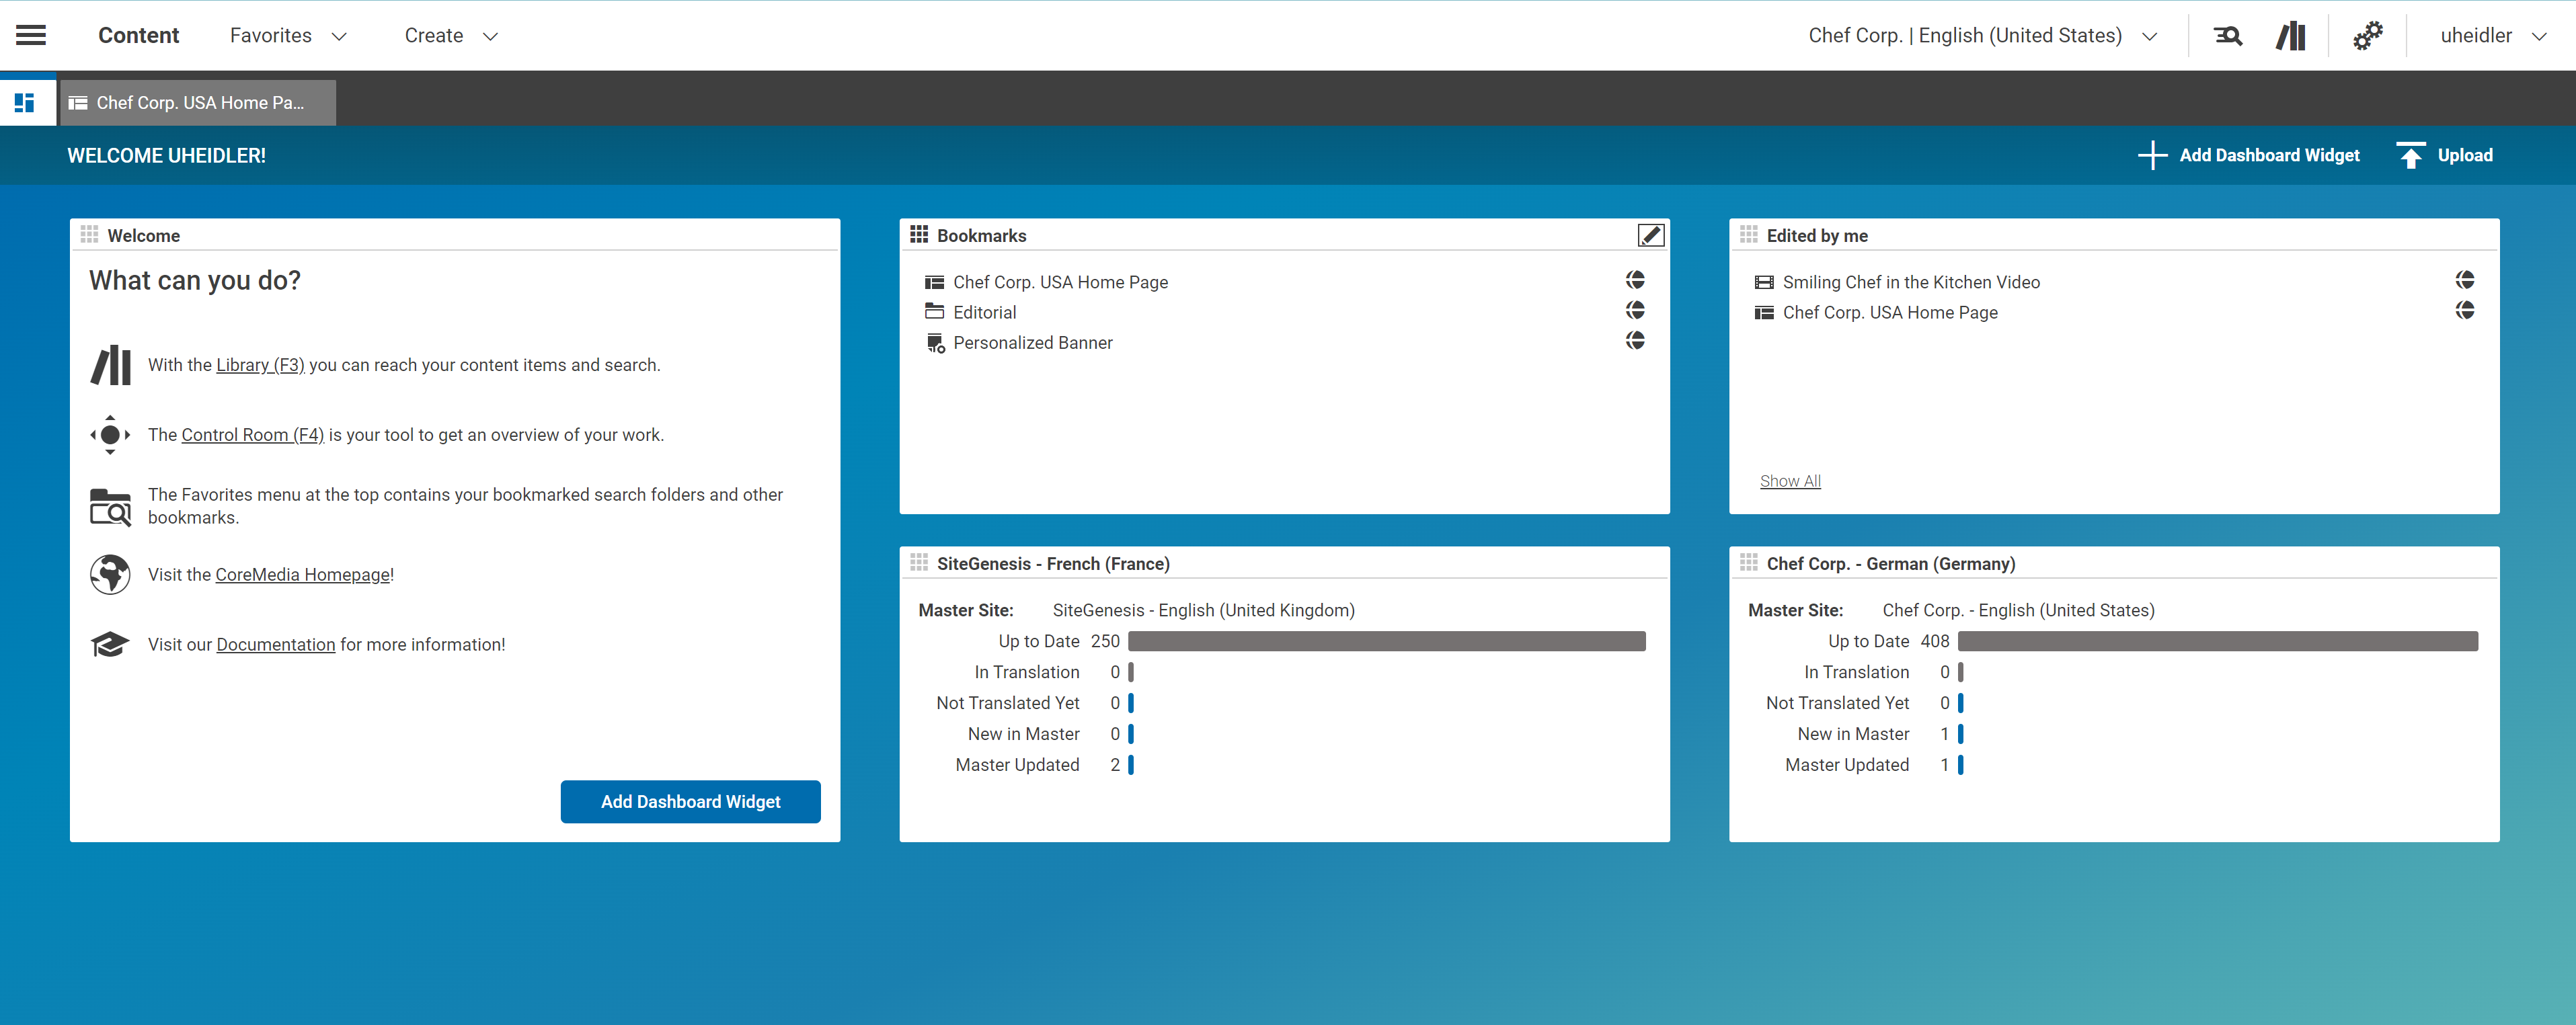
Figure 1: CoreMedia Studio Dashboard
The dashboard is entirely individual and customizable to everybody’s needs. You can re-arrange the widgets, add and remove, and resize each widget individually. To access the dashboard, click on the small Dashboard Icon in the upper left corner of the Studio.
Figure 2
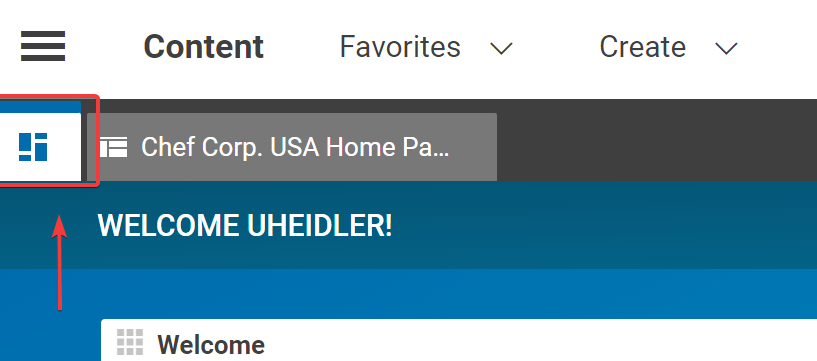
Figure 2: Access the Dashboard via an icon in the upper left corner
From here, click on “Add Dashboard Widget” to add new widgets to the Dashboard. CoreMedia provides a few example widgets out of the box, but you can extend the capabilities to your needs. Talk to your trusted CoreMedia developers to explore more options!
Bonus tip for the dashboard: Create a new widget directly from within the library! Filter for the content you are interested in, then click on the “Disk”-Symbol in the upper-left corner of the library and select the “Widget” option in the appearing dialog.
Figure 3
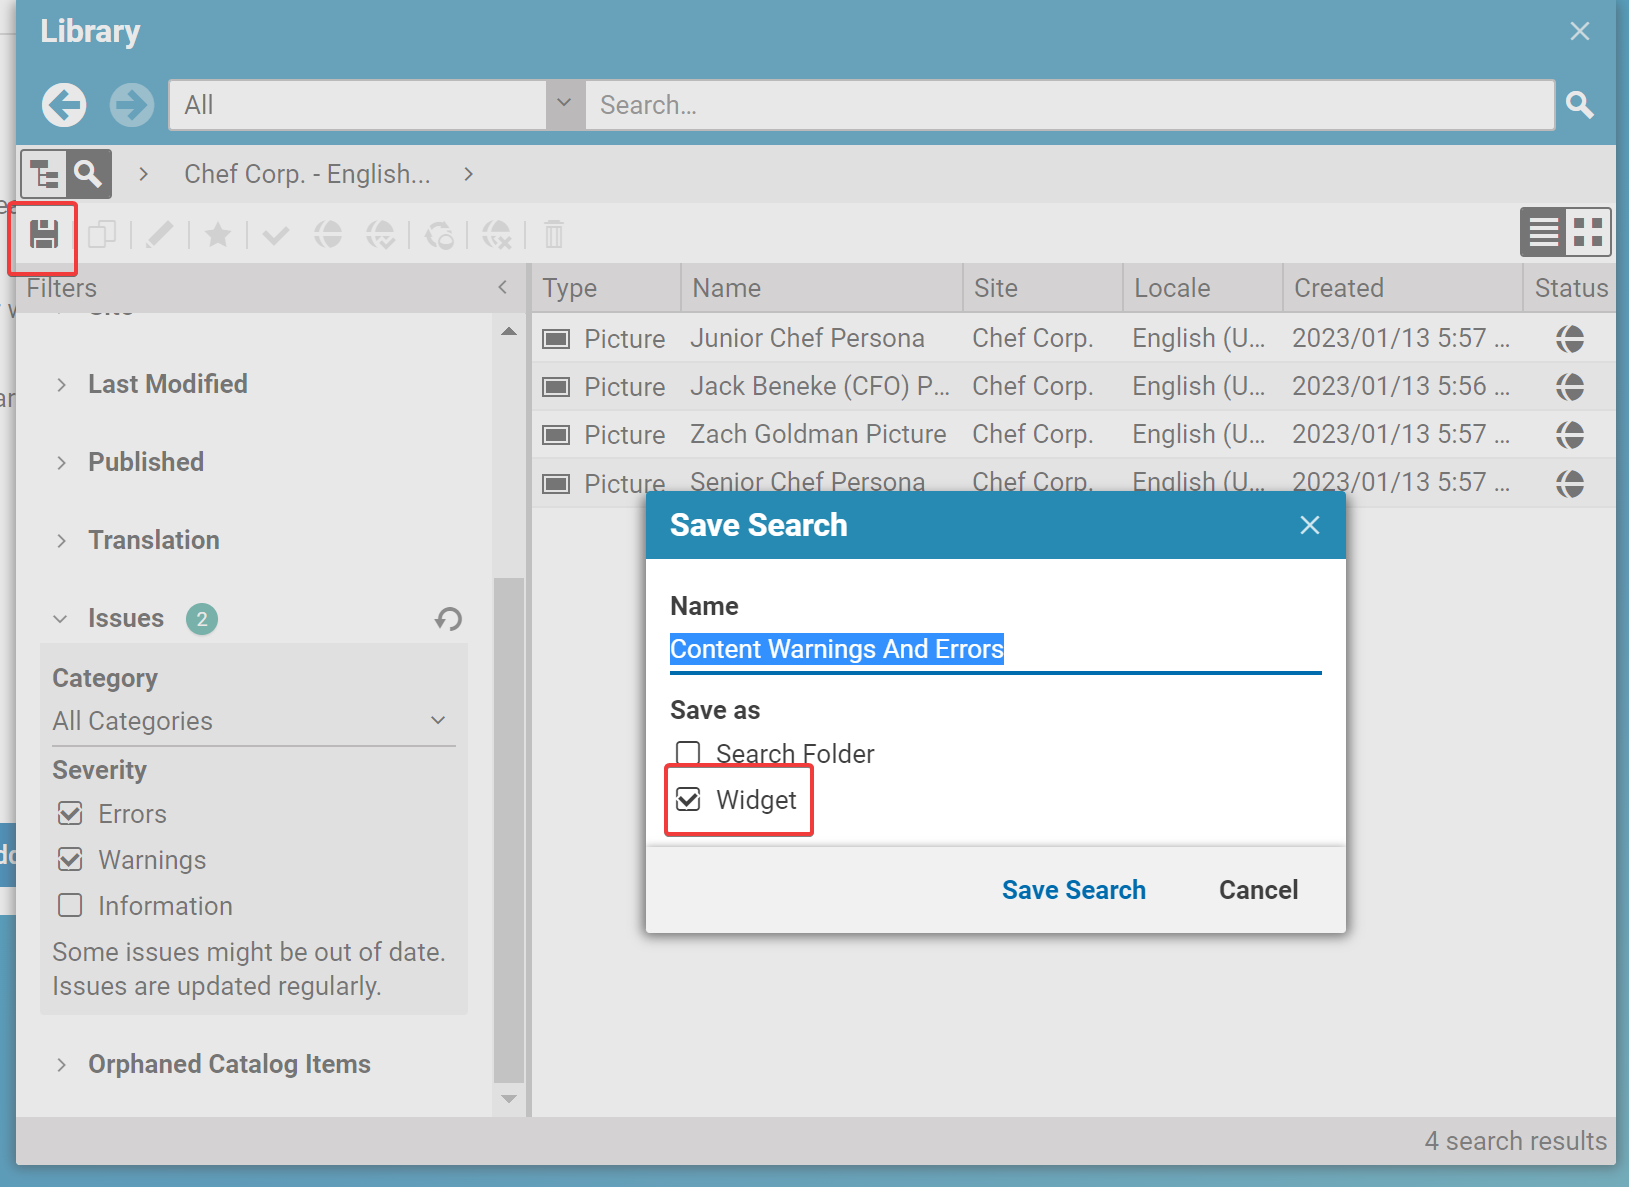
Figure 3: Widget option on "saved searches" dialogue
2. Naming scheme for folders and content items
The content is easy to manage in the early stages of a website. But over time, you and your team create a lot of content. Images, Teasers, Pages, Personalized Content, AB-Tests, Collections – some of them you use temporarily, and some are there for the long run. While tools like the search or the dashboard can help you find the content, you are looking for quickly, thinking about the repository structure and naming conventions can also be very helpful. Here are a few tips that, when applied consistently, will help you maintain an organized and easy-to-use repository:
Make use of folders!
We see multiple strategies in the field. Let me introduce you to a few common ones.
- Organize by usage: Maintain the everyday content separate from the temporary elements. E.g., keep the standard website content under “Editorial” and all campaign content (content that is only occasionally available on the website) in a separate folder, “Campaigns”. This allows you to easily clean up previous campaigns if you no longer need them or if they are not reusable for the next time. Your standard content stays clean and up-to-date.
- Organize by type: Maintain, for example, pictures, videos, or image maps in a dedicated folder. This is often a helpful approach if you have dedicated Media Editors who take care of media assets and their metadata.
- Organize by team/access control: If you have separate teams working on specific areas of your websites (e.g., you have editorial teams for the blog-post/creative section of your site while other groups are working on the classic brand-related areas, keep the area separate for each team. This way, you read/write access specifically for each team and also allow each team to create folder-structures individual to their needs and processes without interfering with others.
These are just some examples. It's important that you and your team define a structure that works best for you. Consider what content you create regularly and what content belongs to the always online items. Do you need to consider access rules (e.g., certain team members should only work on certain content types, or only specific people should have access to read or write content for campaigns or projects)? Keep the hierarchy as flat as possible, but use multi-level structures to organize the work, so your editors find related content quickly.
Give meaningful names to folders and content items!
Choose content names that make it easy to understand what the content is all about. “Personalized Teaser” does not help to understand what this personalized piece is all about. Plus, the content type icon already gives the information that it is a personalized content item. Another unfortunate example is to use the placement name “Homepage Hero Teaser”. Yes, the editor can quickly identify where the content is used, but what happens if you also use the content on a different page?
Every content item has a property that lists the usage of each item, so you can quickly identify where content is being used – no need to transmit this information in the document name. However, if you want to provide that detail as a shortcut, consider using Prefix or Postfix notation such as “2023-01 Sustainable Energy Project Status (HP)”. The postfix “(HP)” identifies this as a standard item on the homepage, but the name has enough information to understand what banner it is. Notice that the example also included the year and Month of its use. You want to skip that if it is an everyday content item (you have the editing history to understand when it was updated the last time). Of course, don’t choose too long of names either; consider using Taxonomies applied to your content to help classify content further. While searching through the content, the metadata is also being indexed and, therefore, can be used to find content. Speaking of searching content, the next hint might also interest you.
3. Quick Search
You already use the library to find your content and might also use saved Searches and Dashboard widgets. But do you know that CoreMedia also has the Quick Search toolbar (available since 2210)? With
just one powerful input field, you are searching through all your content sources – your content repository and your sources connected via the Content and Commerce Hub!
Figure 4
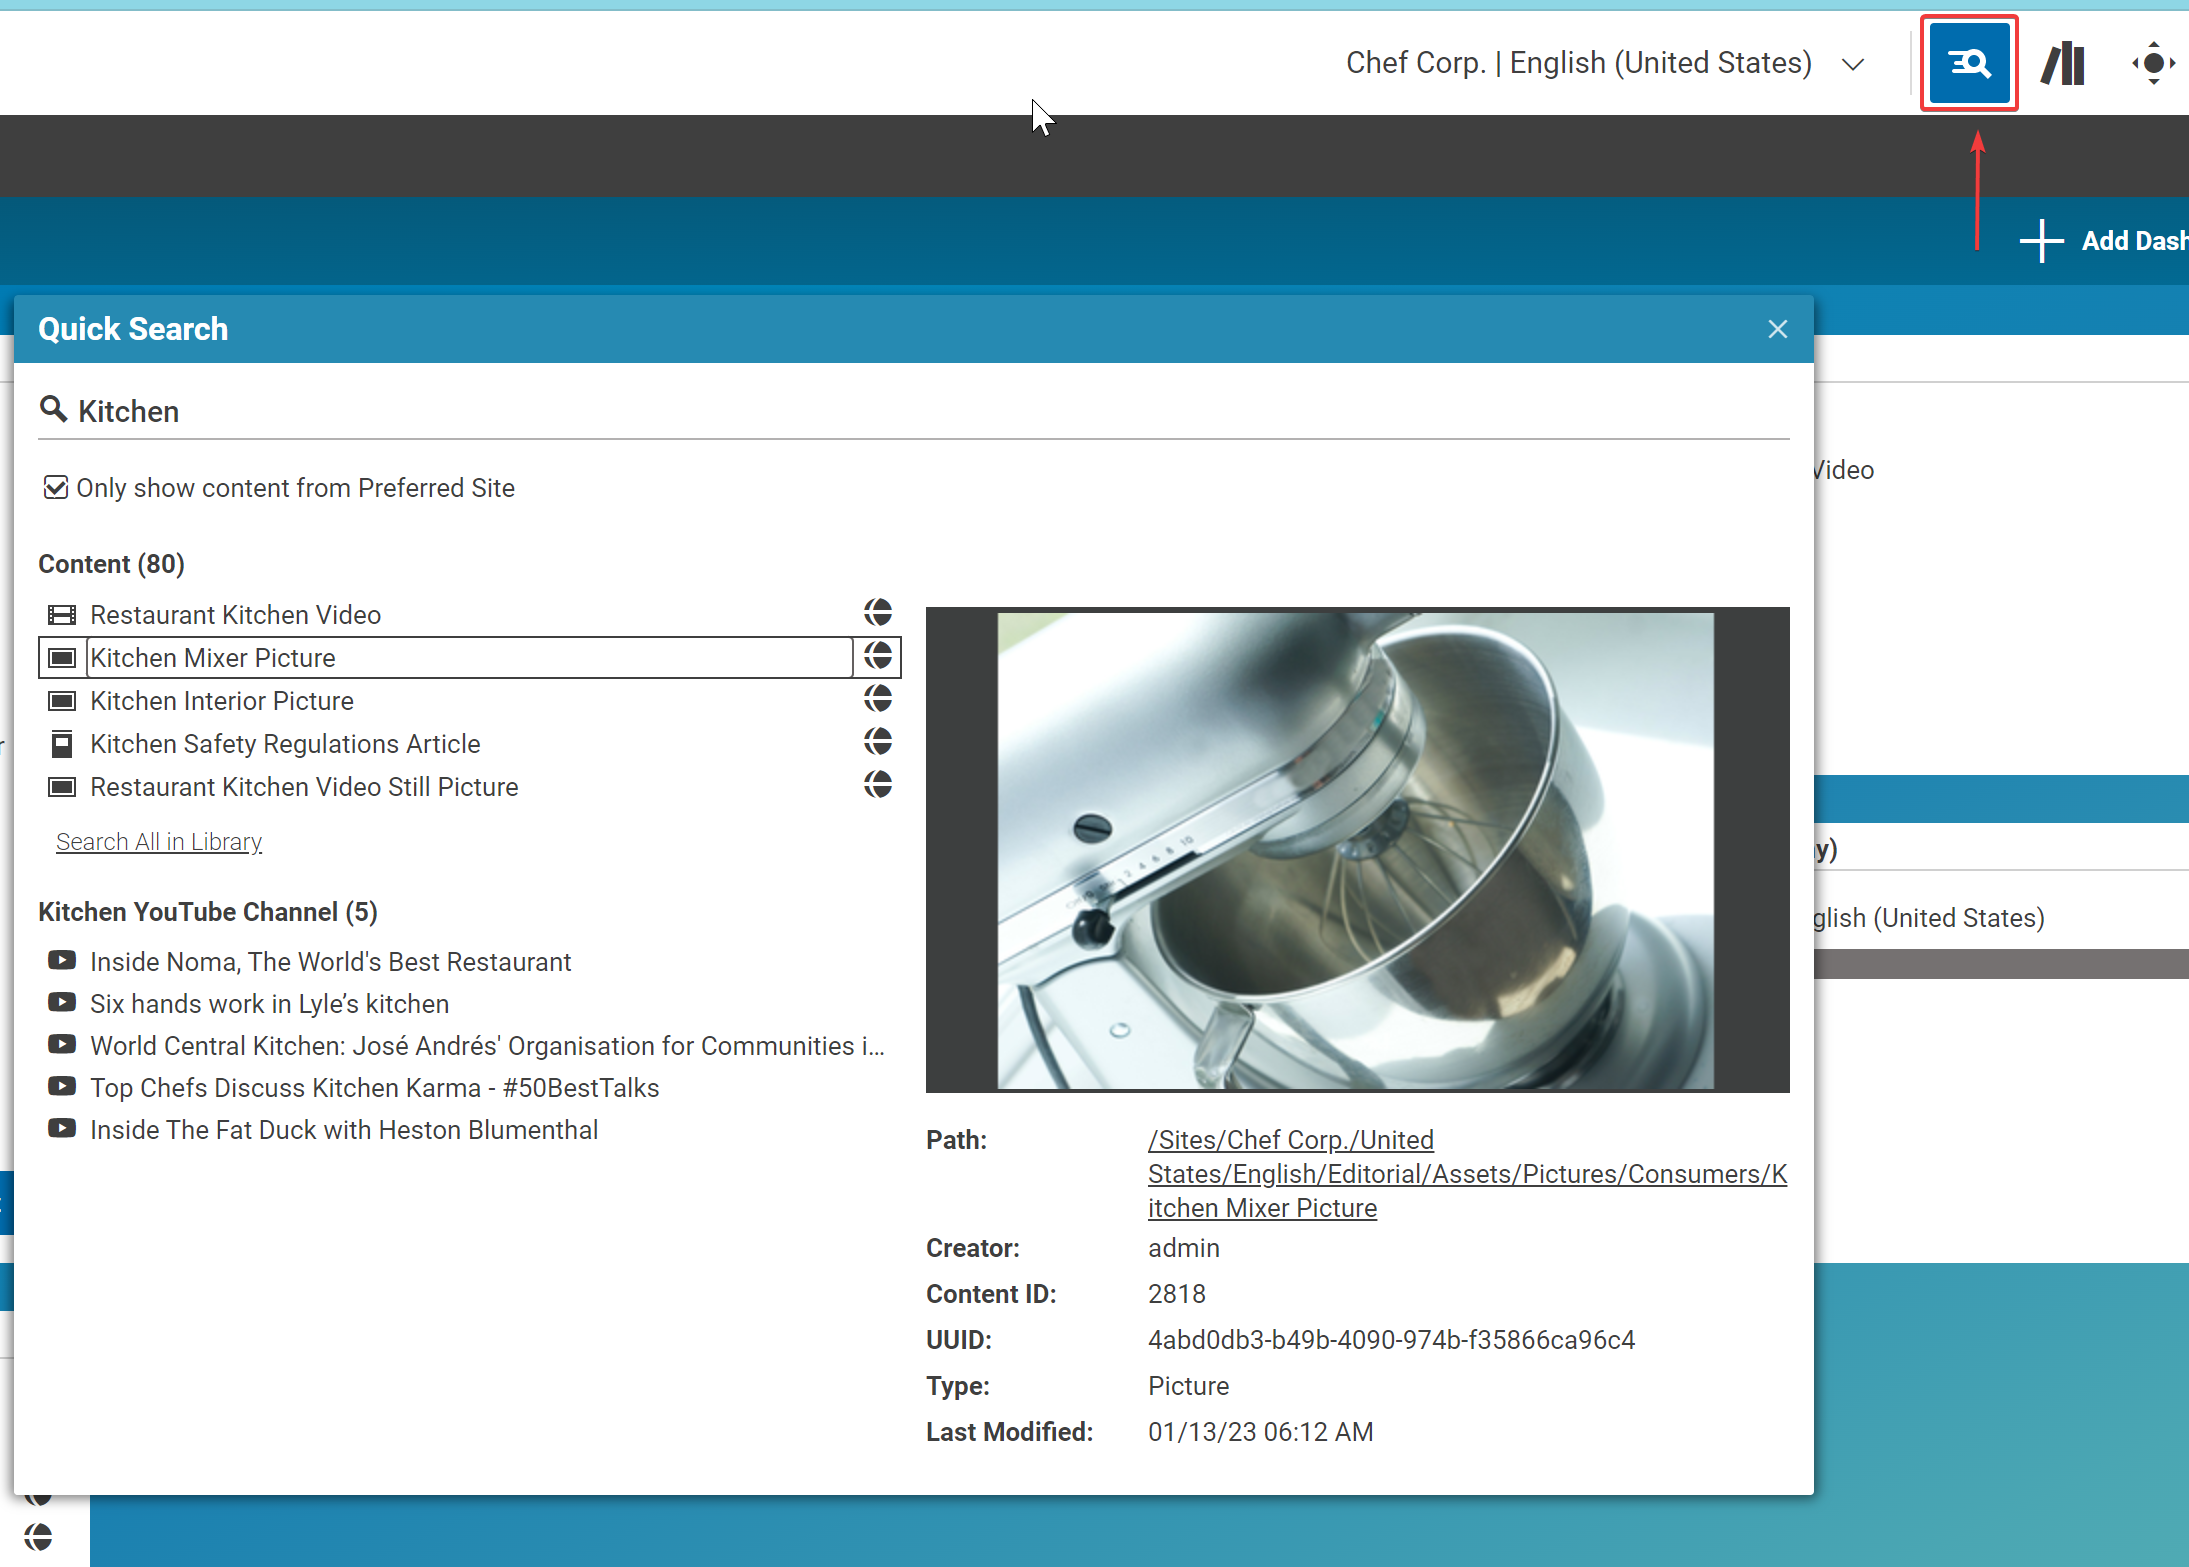
Figure 4: Quick Search toolbar provides ultra-fast omni-source search functionality
Of course, you can get details and a preview for each item and open or directly drag-drop the item into the target place. You access the Quick Search by clicking on the symbol next to the well know Library icon.
4. Color-Coded Content
It doesn’t matter if you browse through the library, search in it, or look at the placements within a page. It is helpful to understand what type of content you have quickly! Every content listing is typically accompanied by a type-specific icon that clearly identifies the type. Still, we also introduced a color code to make it even more apparent whether you look at a Collection, an Article, a Page or a Media asset, or any other of our rich content-type-model. Look at the screenshot below with a search result – it is so much easier to identify the articles from the media assets just by the background color.
Figure 5

Figure 5: Search results within the library with color-coding enabled
There are multiple predefined colors (yes, your trusted CoreMedia developer can also change these for your organization):
Color Coded Table
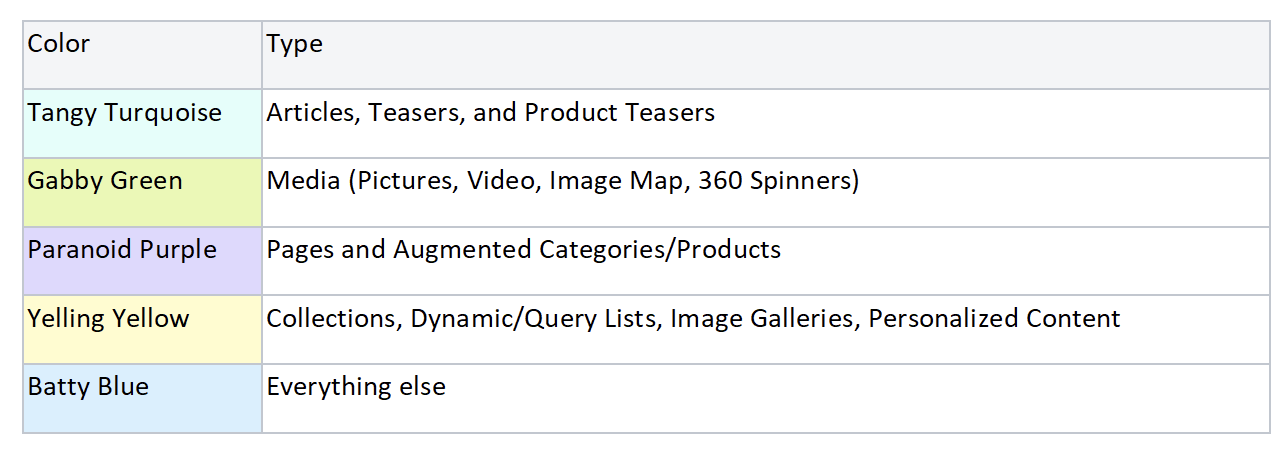
Figure 6
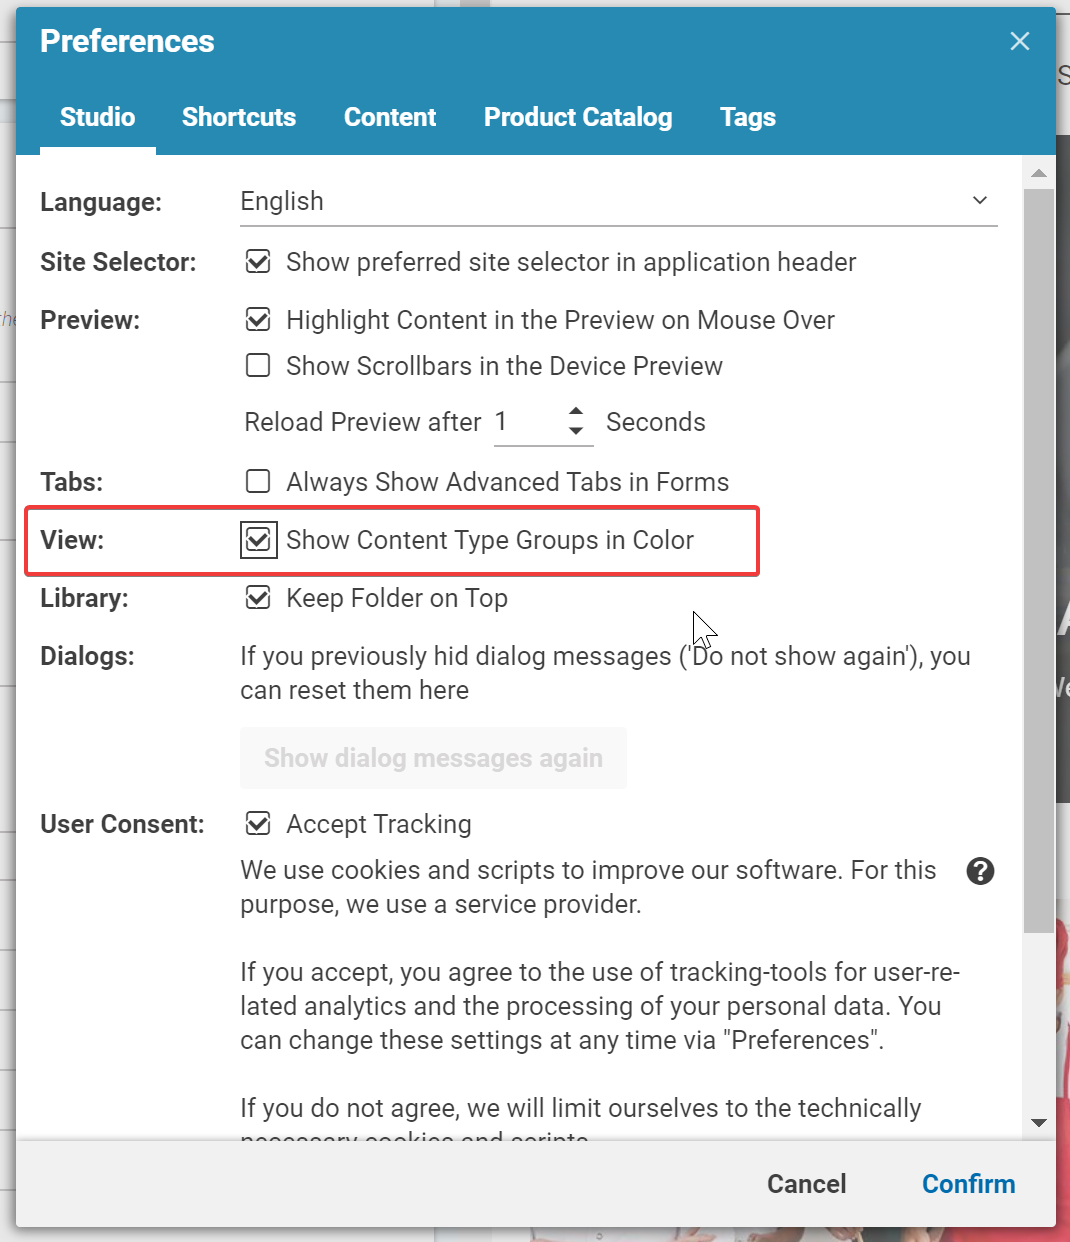
Figure 6: Preference window with the option to enable color-coding of content items
5. Custom visibility for content properties
The final tip for this blog post is the configuration of the various tabs and properties visible on a content type. Efficiency is all about focus, which also means that once you find the content you want to manage, you also want to stay focused on the relevant properties displayed for the content. Therefore, you can configure per content type which tabs or properties you want to see when opening a content item. Don’t worry – the other properties are not gone; they are just hidden from your view. This way, you have a lot more of a clean look tailored to your needs and won’t be bothered with properties that your colleagues manage. To configure the forms, click on the button on top of the editorial pane (see the screenshot below depicting the example for a page item) and select “Configure Form”. This will open a dialog where you can enable and disable the presentation of properties by simply checking the corresponding select box.
Figure 7
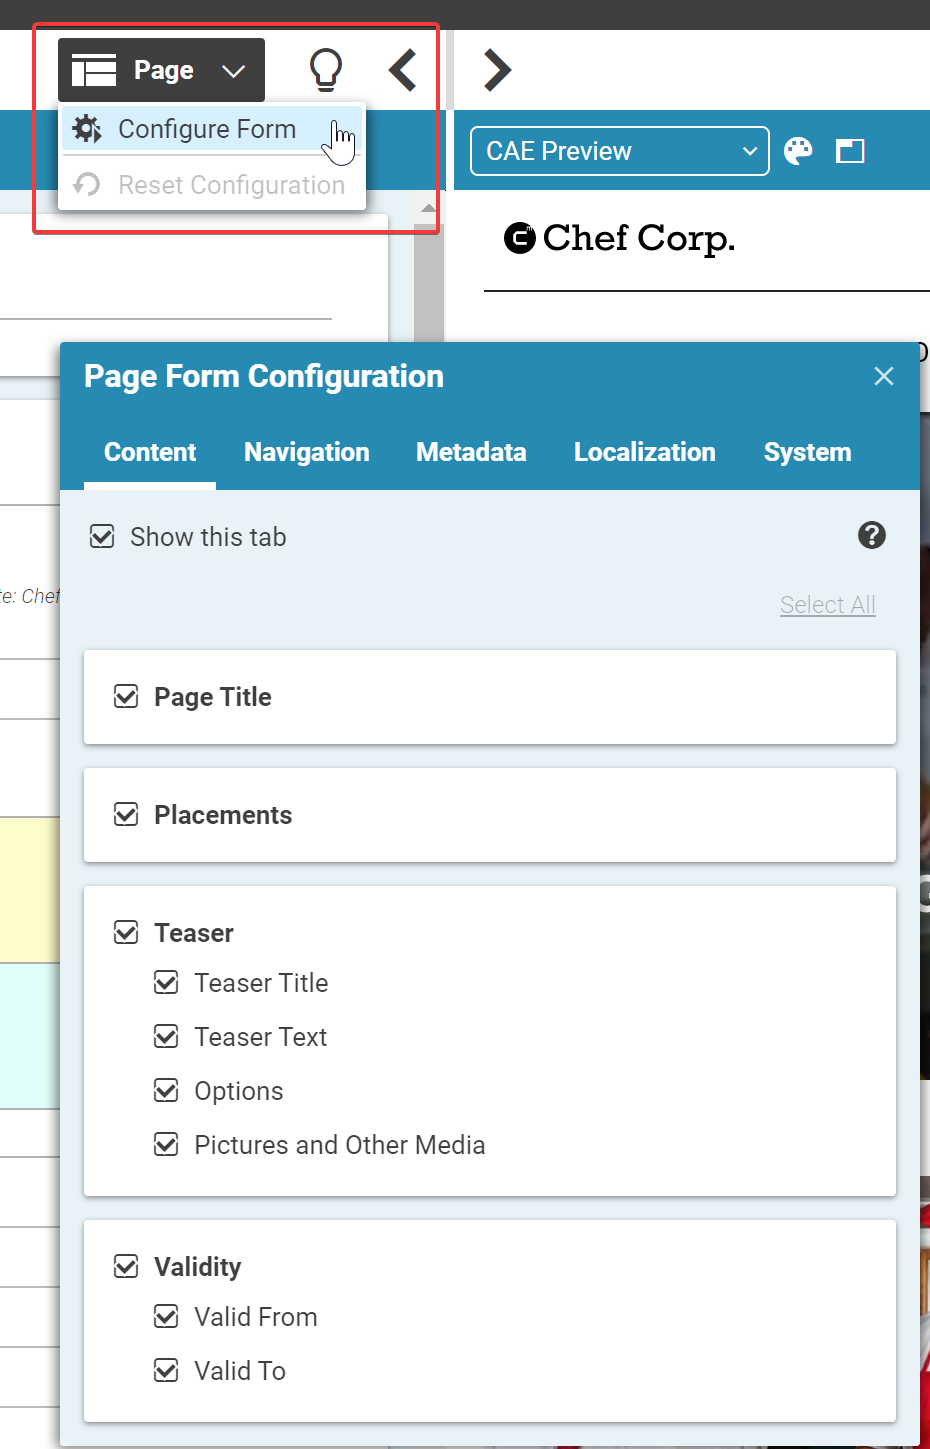
Figure 7: Content item form configuration dialogue (using the example of a page)
Of course, we also added a hint at the bottom of each tab if you need help remembering previously hidden properties!
I hope you find this short list of easy tips and tricks for content handling helpful. For more of these hints, check out the “How to Guide” section in our public documentation and stay tuned for more of these kinds of blog posts.