


CoreMedia has extensive experience in integrating with e-commerce systems, with many customers relying on our proven integration pattern, facilitated by the CoreMedia Commerce Hub. This Hub features prefabricated integration points that are ready to be utilized with our editorial backend, CoreMedia Studio, as well as our delivery engines—whether it's our GraphQL-based headless service or our headful content application engine.
Blended content and commerce experiences
Enhancing the content creator’s experience in creating blended content and commerce experiences is where CoreMedia excels. The CoreMedia Commerce Hub supports standard content-driven use cases out-of-the-box, including:
- Accessing products and SKUs (product variants) from within CoreMedia Studio
- Creating storytelling with embedded products
- Creating shoppable images (images with clickable hot zones)
- Creating shoppable videos (videos with an interactive timeline of products)
- Enriching product listing pages (PLPs) with content at fix positions
- Enriching product detail pages (PDPs) with inspirational content
- Personalizing content experiences based on e-Commerce segments
- Creating blended content and commerce mega menus
And much more.
With the Italian e-commerce vendor Commerce Layer disrupting the market, we saw a great opportunity to test our CoreMedia Commerce Hub integration pattern with them.
So, in this article, we want to demonstrate how easily the integration of a CoreMedia Commerce Hub Adapter for Commerce Layer can be created. The focus is on the developer experience.
Setting up Commerce Layer
If you already have an existing Commerce Layer organization with products in it, this chapter can be skipped. Otherwise, feel free to read through the getting started on Commerce Layer documentation: https://docs.commercelayer.io/core/readme/onboarding-tutorial. After the onboarding tutorial you are ready to go.
What needs to be considered is that you have a git repository for a complete demo-store to test with it (https://github.com/commercelayer/demo-store). Read through the README and start your local store.
Getting your IDE ready
First things first: authentication. Create an oauth method which connects you via API to the store. You need to know your client ID and your client secret. Obviously, the client secret shouldn’t be shared with third parties. Also, you need to connect it with the right domain. The properties should look like this:

To fetch the access token for your organization, it’s necessary to send a POST request to the /oauth/token endpoint.
Now you can manipulate the data and send it via API calls to CoreMedia’s endpoints.
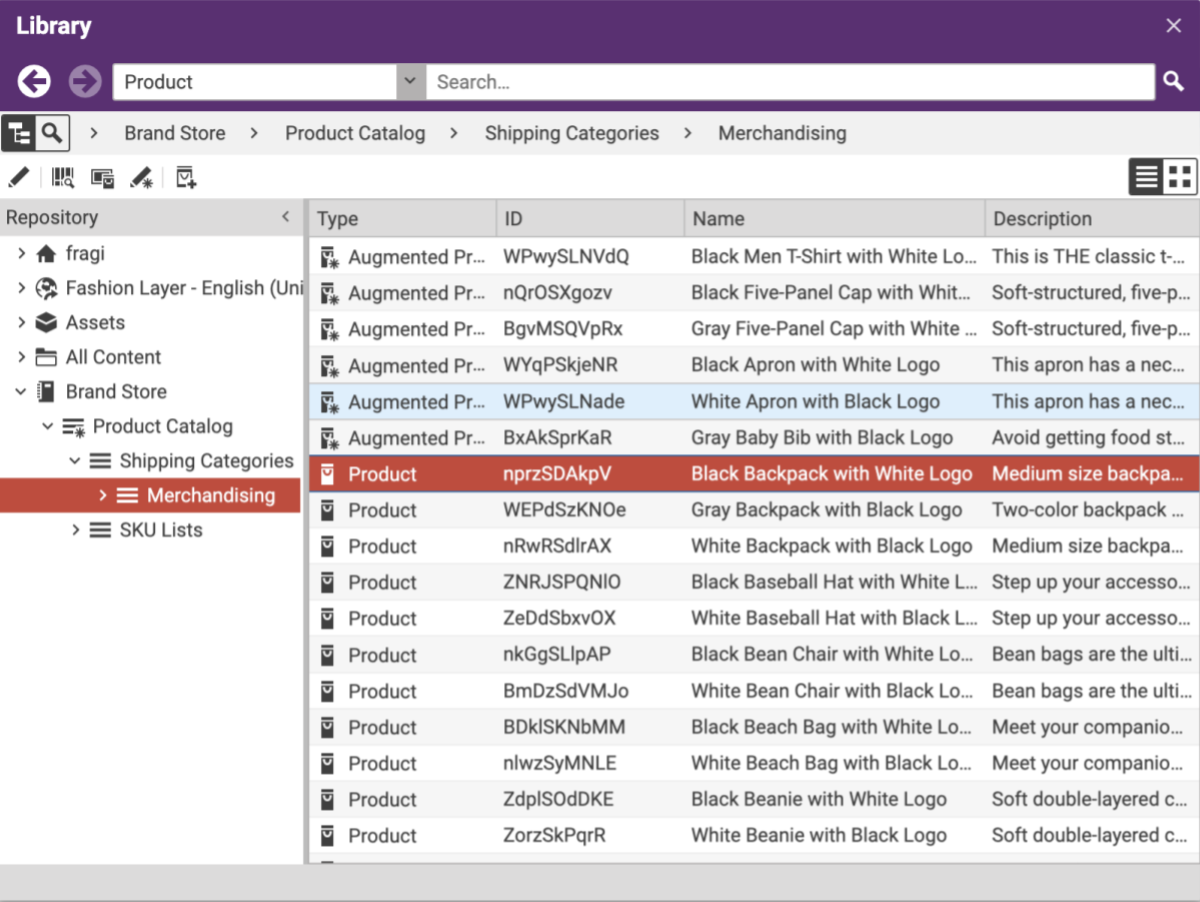
It’s important to notice that there are different entities that you can GET from different endpoints. There are, for example, markets, SKUs, shipping categories, etc. Each one of them has relationships, attributes and a unique ID. For our CoreMedia Commerce Adapter we want to be able to list these relevant entities in the CoreMedia Studio library to allow content creators to embed them into content experiences.
The steps are:
1. Set up HTTP Request
2. GET Market-, Shipping Category-, SKU list
3. GET Relationships between these entities
4. Build a connector to CoreMedia’s Studio Server
5. Show the data in the Studio Client
Step 1:
Include the necessary headers in your request. This usually involves setting the authorization header with your API key and specifying the mime type as application/json.
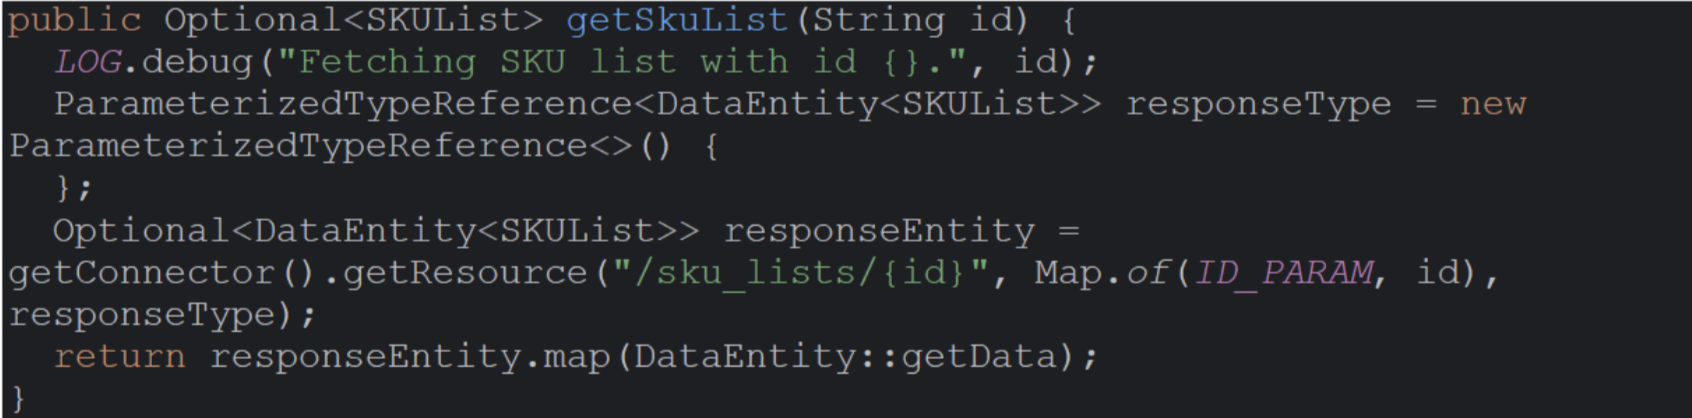
Step 2:
Now, getting the data from Commerce Layer is easy. Using the API token, send a GET post to the right API endpoint. The GET post is generic and could be built with different bodies. For example, if you want to have all SKU lists available the body needs nothing more than the API endpoint. If a specific type is searched for the API needs also the unique ID of the type. It could look like this:
Step 3:
Commerce Layer always returns responses in a JSON format if the HTTP request is set up right. So, attributes and relationships are provided by the response. In this case, it’s easy to read out the relationships that are needed.
Step 4:
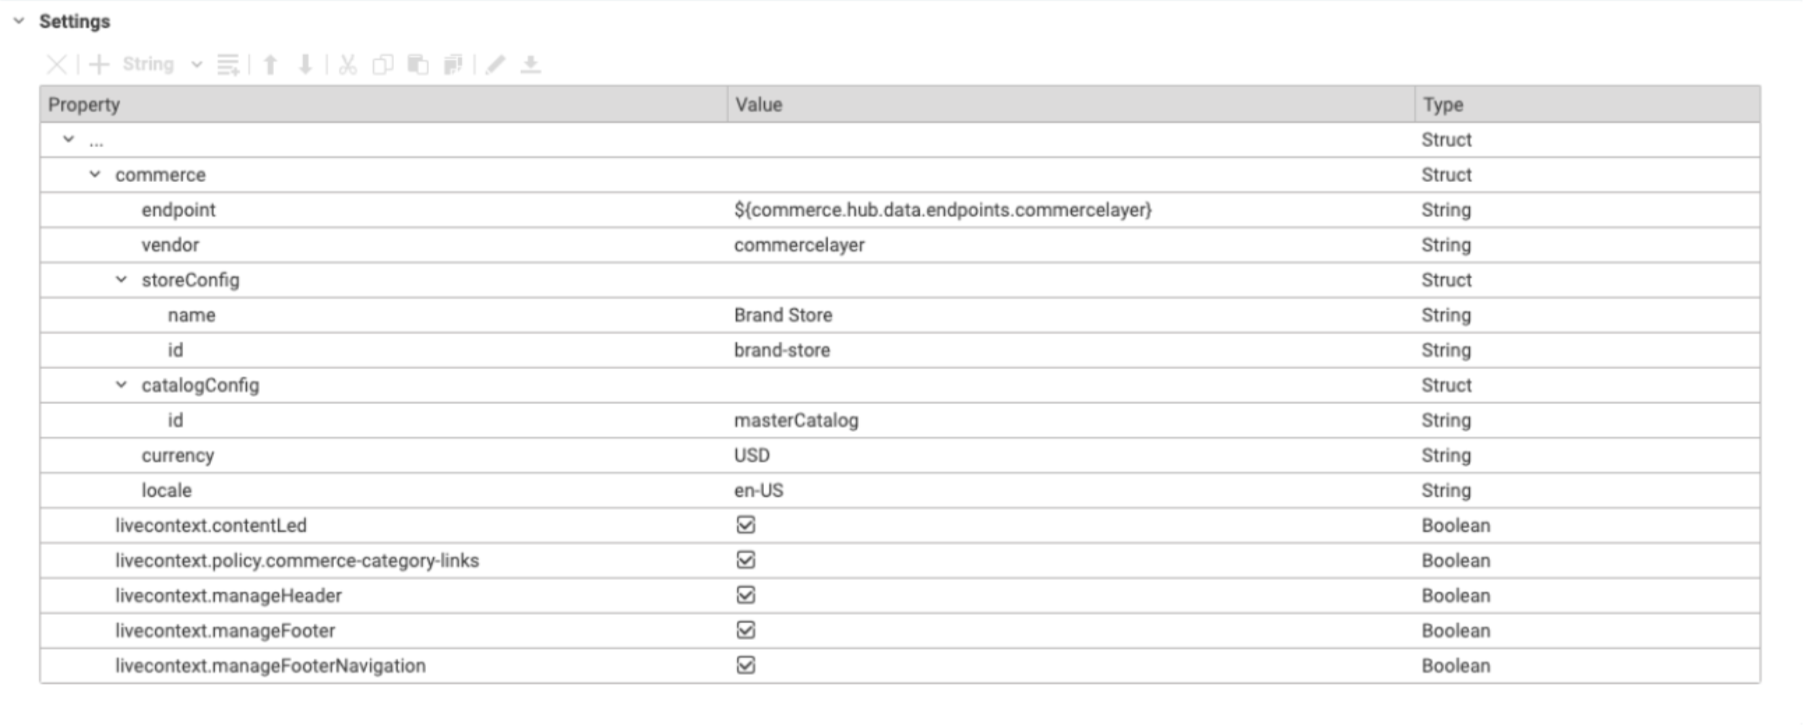
Building a connector to the CoreMedia Studio Server works fine over ports if it’s run on your local machine. Set up the “plugins.directories” property in the run configuration for Studio server to listen on the port, which you have configured in the spring properties in the commerce adapter.
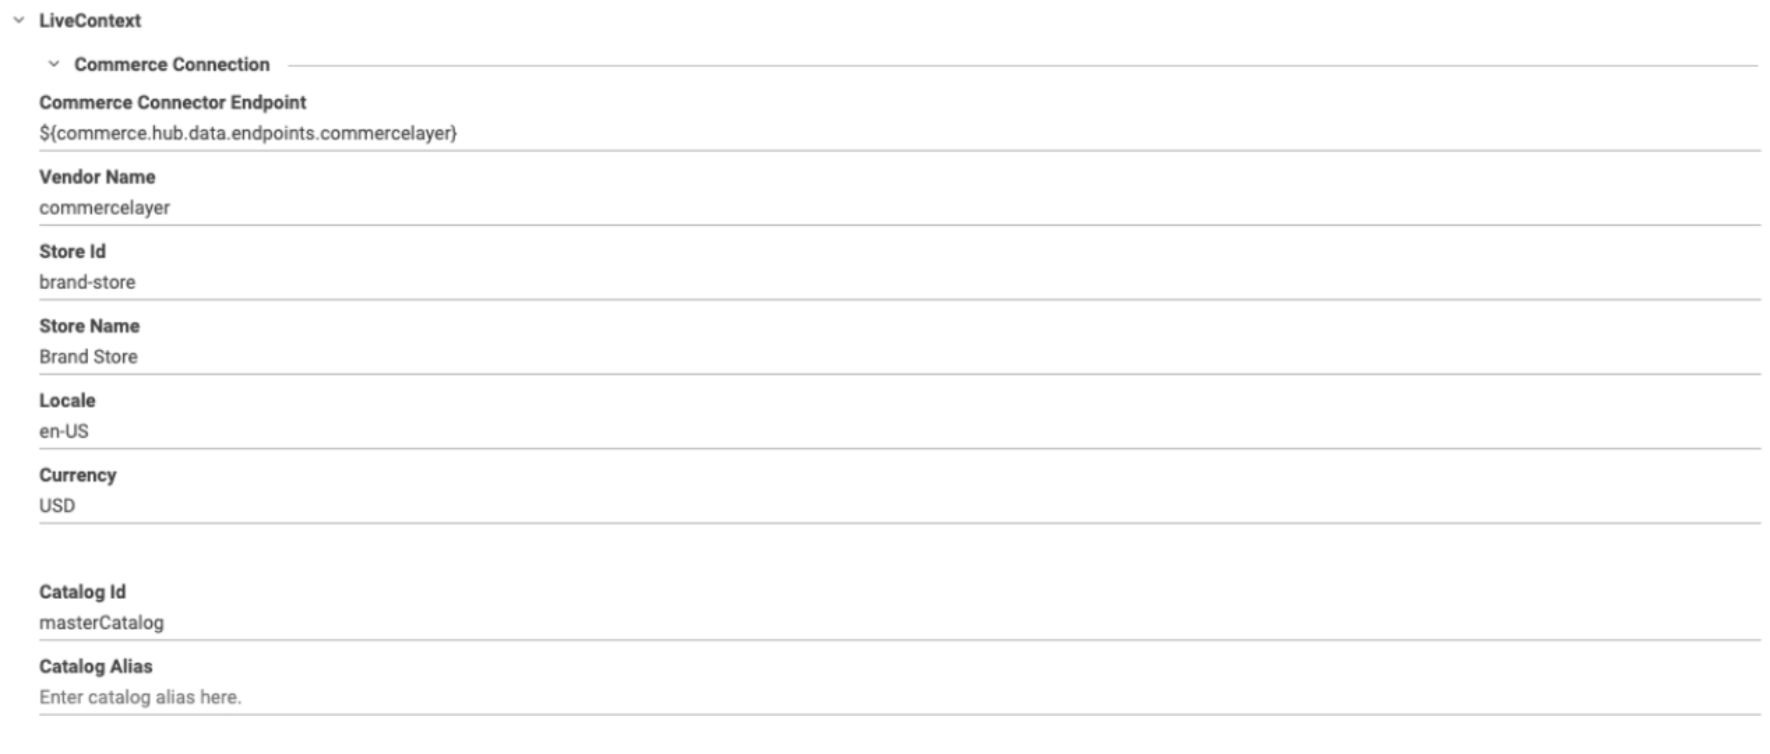
Step 5:
Now let’s get to show the data in the Studio Client. After having defined your port, it’s necessary to adjust the “LiveContext” settings inside the studio-client. Select your previously configured port as the “Commerce Connector Endpoint”. Also, the vendor's name and the catalog Id needs to be set.
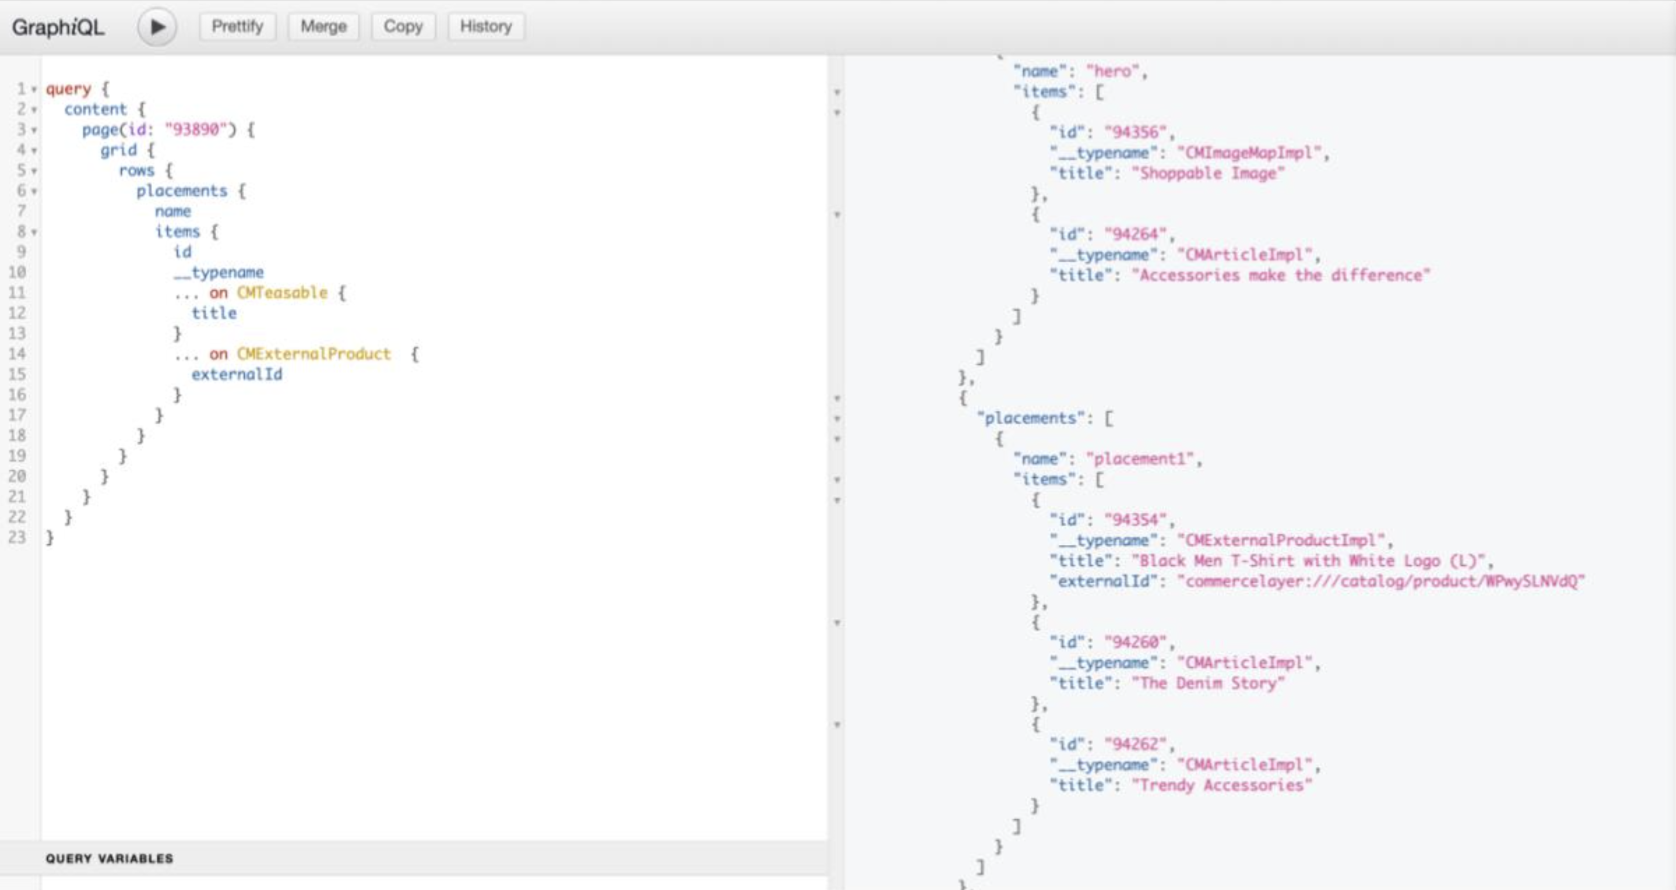
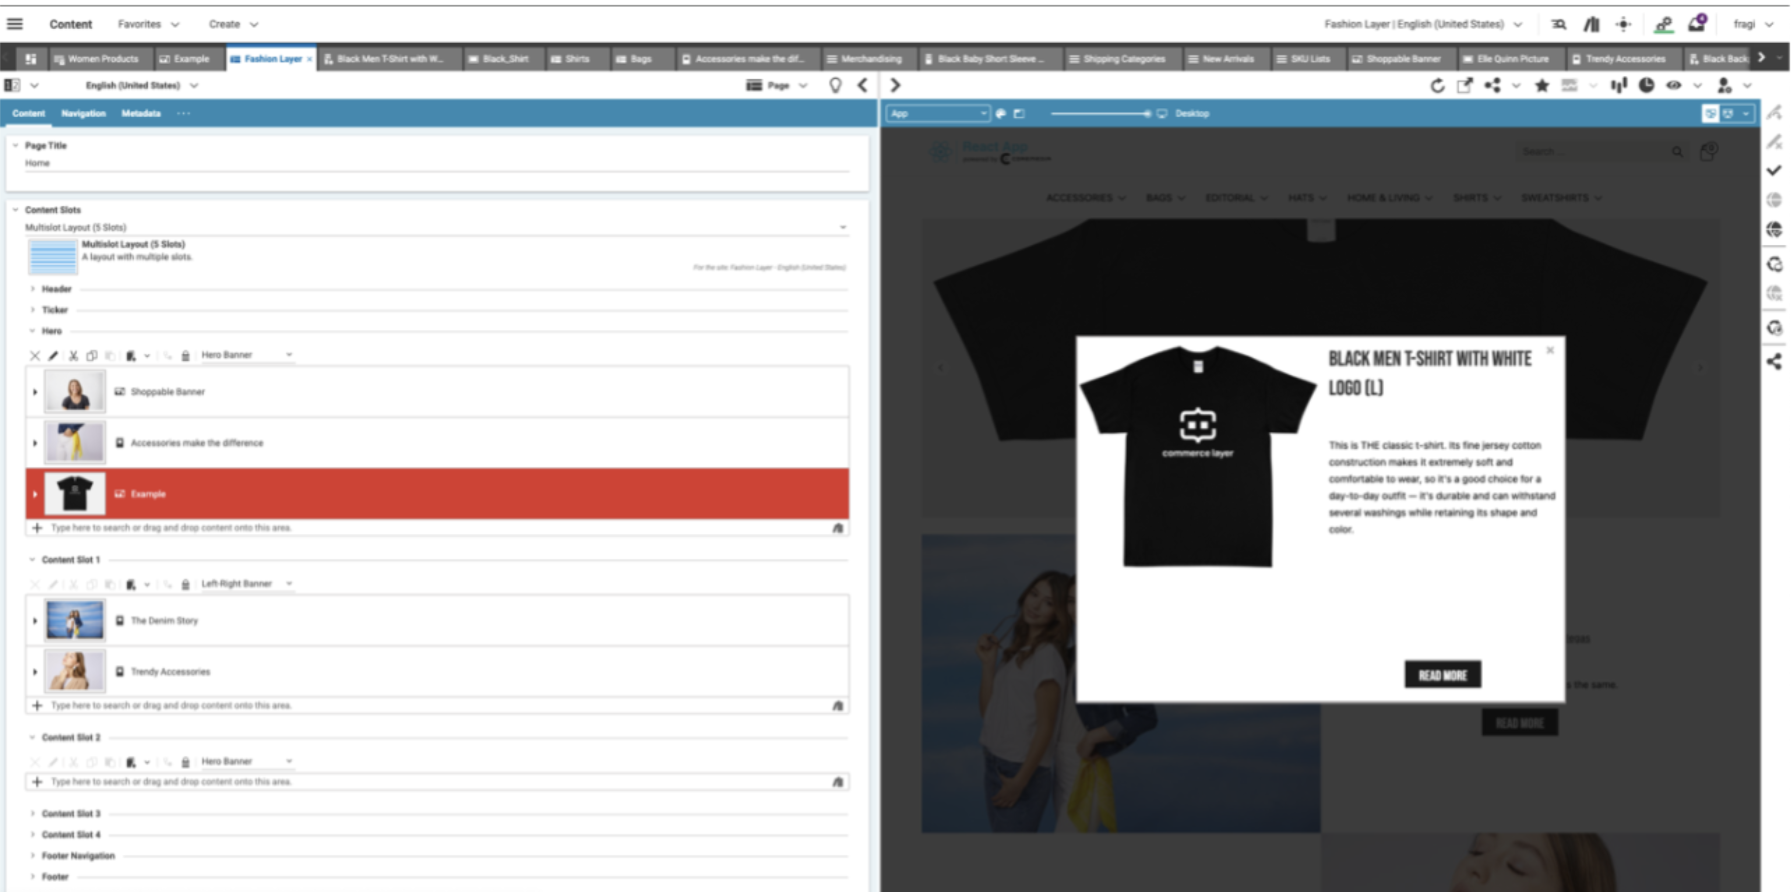
And that’s it! Now, you have connected Commerce Layer via the CoreMedia Commerce Hub. The great thing about our Commerce Hub is that once connected, it will provide product catalog access in CoreMedia Studio for content creators – as well as integration in our headless server based on GraphQL.
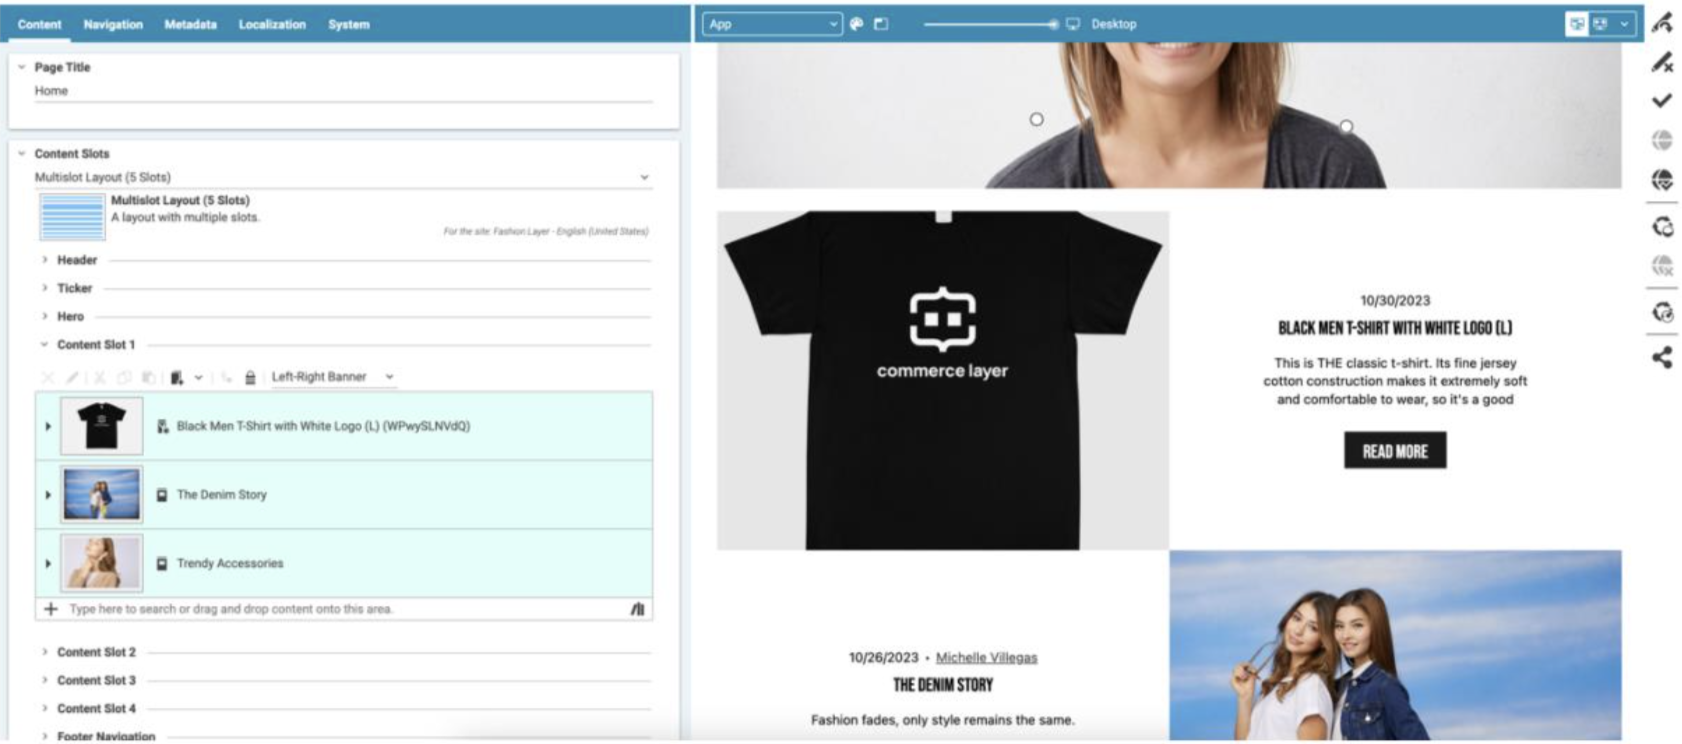
A few examples on how it looks like:
1. Homepage with an embedded product of the demo store of Commerce Layer: First the view in CoreMedia Studio and then the GraphQL view.
2. Shoppable image: The view in CoreMedia Studio and then the GraphQL view.

As you can see, it’s very simple to set up and configure the Commerce Layer specific topics – and due to the high degree of prefabrication in the generic CoreMedia Commerce Hub, you can quickly enjoy the benefits of all the use cases mentioned in the beginning of the article. Have fun!